
- Fallout Shelter Best Weapons Guide - March 29, 2023
- Fallout Shelter Legendary Dwellers Guide - March 21, 2023
- Diamond City Guide - January 31, 2023
Intro
Fallout 4 is Bethesda’s second foray into the world of Fallout. Their first Fallout title, Fallout 3, made massive changes in the series. Bethesda shifted the gameplay loop of the franchise away from isometric turn-based RPG mechanics and more into first-person Action RPG territory.
Bethesda stuck with the Action RPG route in Fallout 4 but revamped or reinvented many of Fallout 3’s gameplay mechanics to turn Fallout 4 into a more modern experience.
While Fallout 4 may not be as complex as a more classical RPG, there are still tons of gameplay elements you need to get a handle on if you want your Sole Survivor to do well in the Commonwealth.
We’ve got tons of in-depth guides on all things Fallout 4 here at WastelandGamers, but this guide will be your quick refresher course for all things you need to know about the Fallout 4 gameplay.
Pull up a chair, grab a Salisbury steak, and a bottle of Nuka-Cola. Let’s get to it.
Character Creation
Appearance

Fallout 4 has a pretty expansive character creation system. You can play as either a male (Default name Nate) or female (Default name Nora) Sole Survivor and have access to a wealth of aesthetic options to customize your character’s appearance.
You can select from pre-made characters if you don’t care much about how your character looks. For those looking to make their Sole Survivor their own, Fallout 4 uses sliders to determine features like your character’s jawline, nose bridge, body weight, and muscle structure.
There are dozens of aesthetic options for other niche elements of character customization, like burns, scars, or bruises. You can make your Sole Survivor look like they went 12 rounds with Mike Tyson or had a run-in with Chibs from Sons of Anarchy.
Players design their character once at the beginning of the game and have a second chance to alter their appearance before leaving Vault 111. After entering the Commonwealth, you’ll need to visit a barber or a plastic surgeon to change your appearance again.
Name
The male and female Sole Survivors’ default names are Nate and Nora, but you can name your character whatever you want. But there’s something you may want to consider before naming yourself MutantSlayer2293: Codsworth.
Codsworth can say over 900 names and will address you as such for the entire game. If you want your robot butler to address you as Mrs. Badass, you can.
It’s not a big deal since only Codsworth does this, and if you don’t actively have Codsworth as your companion, your name will seldom come up. But still, it’s a nice little touch.
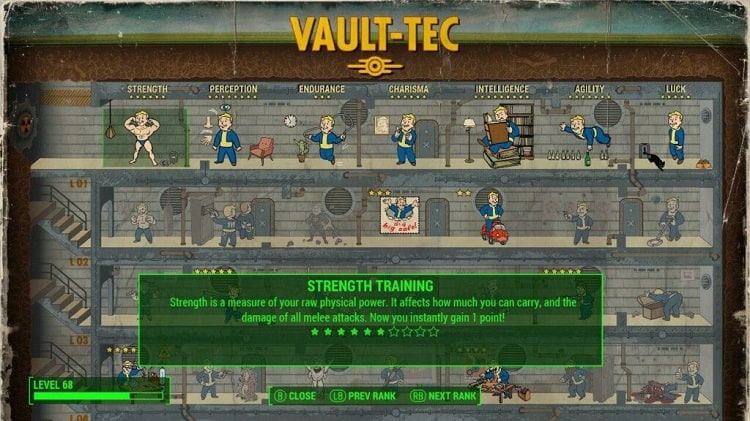
S.P.E.C.I.A.L.
After selecting your name, you will then be able to determine how special you are.
S.P.E.C.I.A.L. is Fallout’s Attribute System, with each letter representing one attribute:
- S: Strength: Affects Melee Damage and Carry Weight. Every point of Strength increases Melee Damage by 10% and Carry Weight by 10 points.
- P: Perception: Primarily affects V.A.T.S. accuracy.
- E: Endurance: Affects Hit Points and Action Points drainage while doing actions like running. Every point of Endurance gives an additional 0.5 HP points when you level up (On top of the 2.5 HP points you always get).
- C: Charisma: Affects Speech Checks, Barter, and maximum Settlers per Settlement. Every point of Charisma you have makes prices slightly better with merchants. Your Settlements can have a default max of 10 Settlers with every point of Charisma allowing for an additional Settler.
- I: Intelligence: Affects XP gains and how easy it is to hack terminals. Every point of Intelligence increases your XP gains by 3%. Higher Intelligence will mean fewer words will be on-screen during hacking attempts.
- A: Agility: Determines your max Action Points and affects pickpocketing and sneaking. Every point of Agility gives you an additional 10 Action Points and increases your pickpocketing chance by 1%.
- L: Luck: Affects recharge rate of the Critical Hit meter. With a higher Luck stat, you will need to land fewer hits before you can use a Critical Hit.
Your character starts with every attribute at 1. You have 21 attribute points to distribute at the beginning of the game. You can acquire one more attribute point by picking up the You’re S.P.E.C.I.A.L. book in your hometown of Sanctuary after leaving Vault 111.
Each attribute also has a bobblehead. Finding each attribute’s bobblehead will increase that attribute by 1. Need help finding these heads that bobble? Check out our Fallout 4 bobblehead guide.
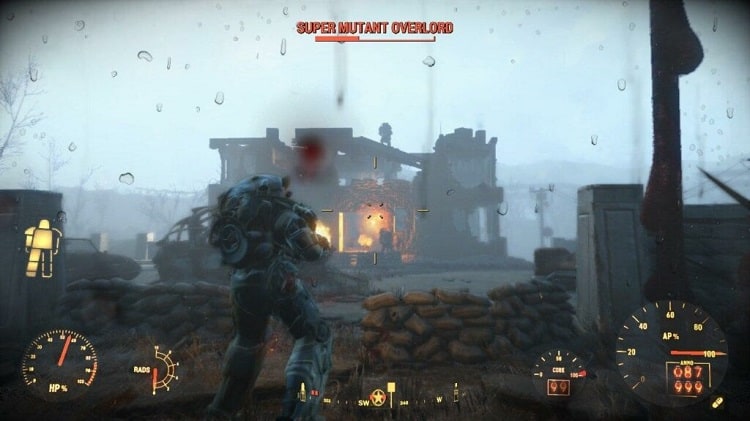
Hitpoints and Radiation
Your hit points are the lifeblood of your Sole Survivor. When they bottom out, you die.
The following formula determines health scaling:

You can increase your maximum hit points via perk, consumable, or armor buffs to hitpoints or Endurance. You can recover hit points via sleeping, doctors, or aid items like food or stimpaks.
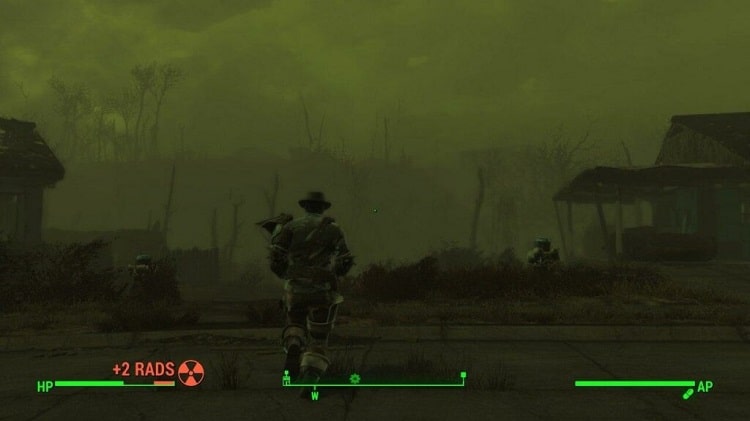
The game tracks your radiation level on your health bar. As you take on radiation damage, your health bar will slowly fill up with red. You lose 1% of your maximum hit points per 10 rads. At 1000 rads, you die.
Radiation damage mostly comes from obvious places like nuclear material spills, radiation barrels, and Glowing enemies. There will also be occasional radiation storms that blow into the Commonwealth from the Glowing Sea. To prevent yourself from taking damage from these storms, duck inside a shelter or building.
You can cure your rads via items like radaway or a doctor’s help.
Action Points
Your Action Points, or AP, affect your ability to perform various actions. Actions like running, holding your breath while using a scope, V.A.T.S., and power attacks use up your AP. Different weapons have different AP costs. Expect larger weapons like the Fatman to use more AP than something like brass knuckles.
Your AP has a base regeneration rate. You can increase it via consumables, perks, or certain legendary effects. You can also decrease the AP cost of actions via perks or legendary effects. Potent consumables like the mirelurk egg Omelette can restore your AP and allow you to spam AP moves.
Perks
Fallout 4 removes skills entirely and replaces them with a perk tree system. Upon leveling up, you gain one level-up point that you can use to select perks. You can also use your level-up points to increase one of your S.P.E.C.I.A.L. stats.
Along with attributes affecting various game elements, they function as perk gates. Every attribute governs ten perks. These perks are thematically appropriate depending on their governing attribute.
Strength perks primarily deal with increasing Melee, Unarmed damage, and Carry Weight. Luck perks increase your potential with Critical Hits or finding more loot in the Commonwealth. So on and so forth.
Each level-up perk has between 1-5 ranks. Accessing these perks requires you have the required stat level. Any player can access the first rank of any perk provided they have the attribute requirement. Additional ranks have level requirements before you can select them.
Not all perks are equal, and you may find some attributes less useful than others. You can use this to your advantage when designing your build. You will seldom run into robots early on, so picking up Robotics Expert at level 2 is a waste.
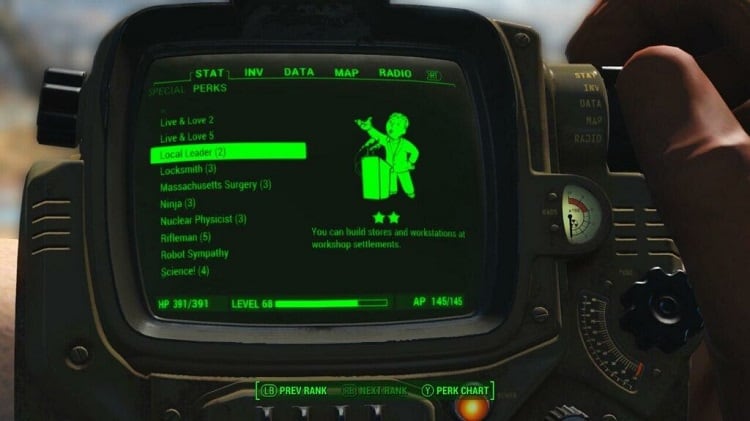
The Local Leader perk is required to get the most out of Settlements, but an early-game Sole Survivor can’t afford to become a Settlement Baron.
You also don’t need to use level-up points immediately upon leveling up. If there are some perks you want to pick, but you don’t meet the level requirements yet, you can save your level-up points for later. Don’t feel pressured to pick a perk every time.
Difficulty Settings
Fallout 4 has six difficulty levels: Very Easy, Easy, Normal, Hard, Very Hard, and Survival. Difficulty primarily affects three things:
- How much damage you deal to enemies
- How much damage enemies deal to you
- How much you encounter legendary enemies
The higher the difficulty level, the weaker you’ll be, the stronger your enemies will be, and you’ll encounter legendary enemies more often. You can change your difficulty level on the fly at any time.
Survival
Survival is a different beast entirely and drastically changes the gameplay. On Survival, you have less carrying capacity, and ammo has weight. You cannot use fast travel on Survival and must travel on foot everywhere. Your HP recovers at only 10% normal speed, making combat far more dangerous.
You must eat, hydrate, and sleep properly, or you will suffer from diseases like insomnia and fatigue. If you catch an infection, you will take continuous damage. You have to cure it with antibiotics or via a doctor, or you will die.
On Survival, you can only save at a bed. Beds are also no longer equal in Survival. You can sleep as long as you want in a proper bed, but a loose mattress only allows for five hours of sleep max.
You can only sleep for an hour in a sleeping bag. As a former boy scout, I’m going to have to disagree with this. Then again, I didn’t live in a post-apocalyptic wasteland.
Pip-Boy
Fallout’s iconic Pip-Boy is your all-in-one User Interface tool. It features five menus:
- Statistics
- Inventory
- Data
- Map
- Radio
Statistics
The Stats menu displays everything related to the Sole Survivor’s character build and well-being. Here you’ll find stats like your hit points, radiation levels, limb damage, attributes perks, resistances, and XP.
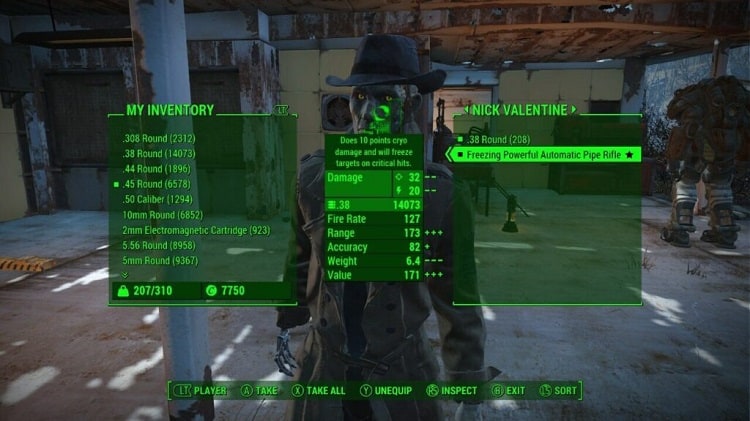
Inventory
The Inventory menu displays all of your items. Items fall under seven categories:
- Weapons: The weapons tab displays all of your available weapons. You can equip and unequip weapons in this tab and use it to inspect weapons’ mods or view their damage output.
- Apparel: The apparel tab is where you will find all your weapons and clothing. You can use the apparel tab to equip and unequip armor and clothing. The bottom right corner of your Pip-Boy will display all your resistances provided by items you have equipped.
- Aid: The aid tab contains all your food, drinks, chems, and medicine. It also displays your hit points at the bottom of the screen. Here you can view the positive and negative effects of your aid items.
- Miscellaneous: The miscellaneous tab contains all the odds and ends you find in the Commonwealth. Items like holotapes, holotags, magazines, folders, notes, keys, and bobby pins are here.
- Junk: The junk tab contains every junk item in your inventory. You can view what components junk items consist of in this tab. If you purchase shipments of junk from vendors, they will be here too.
- Mods: The mods tab contains all weapon and armor mods in your inventory. Pay attention to this tab after modifying weapons and armor. You might take on a lot of extra inventory space from mods you no longer use.
- Ammo: The ammo tab contains all your available ammo and power cores.
Data
The Data menu is primarily a progression tracker that keeps track of three factors:
- Quests: The quests tab tracks unstarted, ongoing, and completed quests. Your miscellaneous objectives will also be here.
Miscellaneous objectives vary from quest starters for main quests to radiant quests you can do endlessly. You often unlock these objectives via notes or conversations with NPCs.
- Workshops: The workshops tab tracks the stats of every settlement currently under your control, like happiness, water, food, defense, beds, and population.
You can also use it to see which settlement is under attack and track any settlement’s map marker.
- Stats: The stats tab tracks various in-game stats on actions you’ve taken in the Commonwealth. Five sub-tabs make up the stats tab:
- General: Displays stats like days passed, hours slept, and how many locations you’ve discovered.
- Quest: Displays the number of quests you’ve completed, be they main, side, or miscellaneous.
- Combat: Tracks your combat kills for every enemy type or NPC in the game. It also displays combat-related feats like critical hits scored.
- Crafting: Displays all stats related to crafting and settlement building. Use the crafting sub-tab to see how many items you’ve crafted, settlements you’ve founded, items you’ve scrapped, or plants you’ve harvested.
- Crime: The crime sub-tab displays all less-than-legal actions you’ve taken throughout your playthrough, including thefts, assaults, and murders. It also shows how many locks you’ve picked and terminals you’ve hacked (Though it confuses me how hacking the terminal of someone deceased for 200 years is illegal).
Map
The map menu displays the entire in-game map for the Commonwealth. It always starts at your current location, but you can scroll across it to scope out places to visit and set waypoints. You can use the map as a world or local map, though local maps are often quite useless.
You will often discover the locations of places in the Commonwealth via conversations, notes, or terminal entries. Using the map, you can see exactly where a newly-discovered location is. After visiting any location once, you unlock the ability to fast-travel there. (Unless playing on Survival).
You can also use the map to find out the location of your current quest objective.
Radio
The radio menu contains all the frequencies of the Commonwealth. That includes permanent radio stations like Diamond City Radio or limited-range radio transmissions. You start with Diamond City Radio and Classical Radio by default, but you’ll need to find the rest.
Your Pip-Boy is also used as a key to unlock Vaults, a Geiger counter for detecting radiation, and a flashlight while not inside Power Armor.
Waiting
Manually skipping time is a good way to clear up some nasty weather or if you want to turn night into morning, or vice-versa. If you aren’t on Survival, you don’t need to sleep to skip hours of in-game time. You can wait instead.
To wait in Fallout 4, sit down on any bench, chair, stool, etc, and press the indicated button at the bottom of the screen.
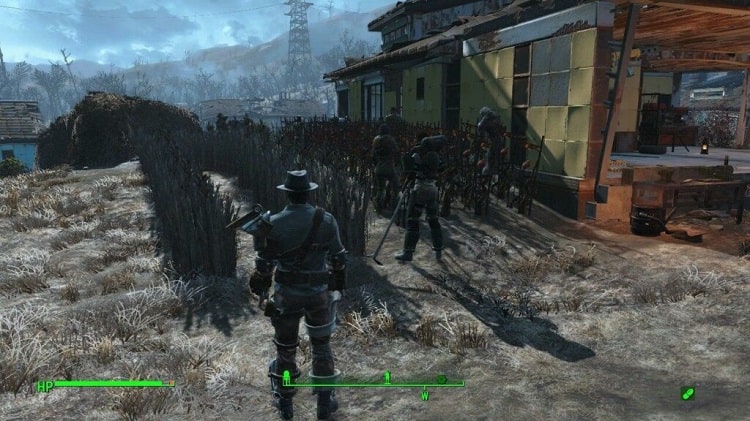
Settlements
The Settlement system is the marque gameplay mechanic of Fallout 4. The game introduces you to Settlements in one of the first quests of the main storyline, but you can get started on your own. There are dozens of settlements in the Commonwealth for you to run.
Settlers
To run a settlement, you need settlers. A small handful of named NPCs are recruitable settlers, but you will acquire most settlers via a settlement recruitment beacon. Once they arrive, you can assign them tasks or make them vendors or provisioners.
Settlers come equipped with their own items, but they usually have poor weapons and no armor. If you want to increase their effectiveness in the event of an attack, you must outfit them accordingly.
With the exception of the Fatman and missile launcher, settlers have unlimited ammo provided you give them one unit of ammunition. Once you gain access to powerful weapons like the Gauss rifle, your settlers will become quite formidable.
Just be careful not to hit your settlers during a fight. It’s impossible for hostile enemies to kill your settlers (Except for Synth infiltrators), but you can kill them at any time.
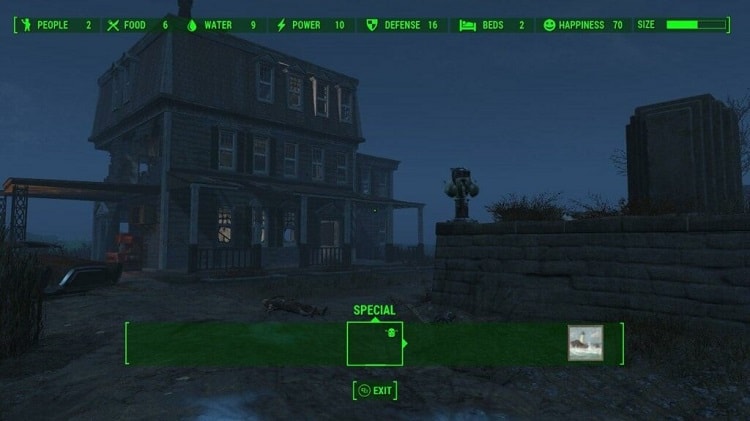
Settlement Needs
Settlements have five necessities:
- Beds
- food
- water
- power
- defense
Without all of these, your settlement’s happiness rating will drop. Happy settlers are productive settlers. Unhappy settlers aren’t good workers. Beds, water, and defense are no problem, but food requires settlers to put on their coveralls and farm the land. You can assign specific settlers to specific crops, or they will get to work on their own.
To create any of these necessities, you need to enter Workshop mode.
Settler Requests
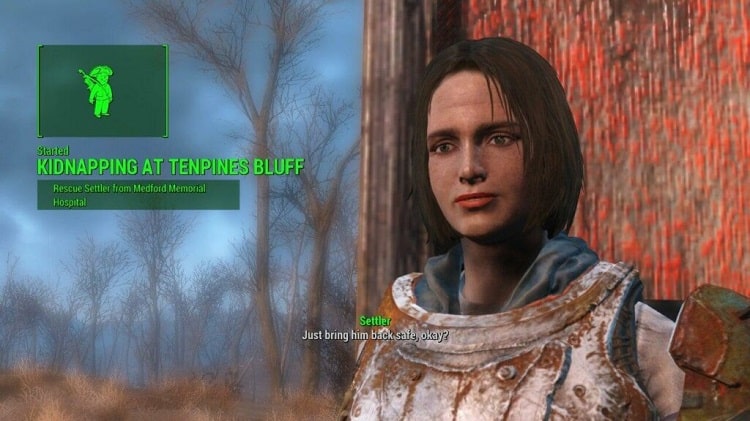
Random attacks aren’t the only threat to your settlements. Sometimes, settlers will ask you for help dealing with nearby raiders or ghouls. Even worse, your settlers will be the occasional victims of kidnappings, and you’ll have to rescue them.
Failing to do so will result in the loss of that settler (In the event of kidnappings) and decreased happiness overall. Turns out settlers aren’t fond of being kidnapped and killed.
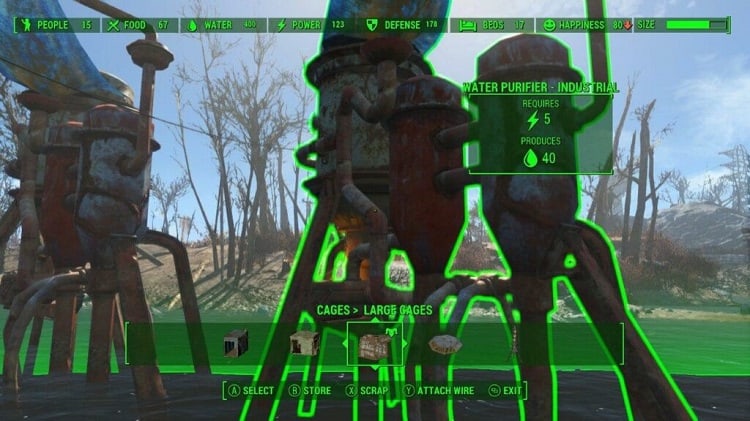
Workshop
The Workshop is where all the settlement-building magic happens. You can access the Workshop mode at any settlement under your control. Once in Workshop mode, you can scrap and move objects, assign settlers to tasks, and create settlement items, structures, or gardens.
Loose items in settlements play out in different ways. Anything highlighted in yellow is scrapable only. If something is highlighted in green, you can move it or store it in the Workshop. You cannot interact with items highlighted in red.
Via the Workshop, you can create all the necessities your settlements need. Once you have the needs taken care of, you can start building whatever you want. Want to make a Deathclaw cage? Go for it. Do you want all of your settlements to look like Broadway and have a bunch of flashy neon lights? Feel free.
But to get the most out of the Settlement system, you need to become a Local Leader.
Local Leader
The Local Leader perk has two ranks and requires level 6 Charisma. Each rank provides vital utility to your settlements.
Supply Lines
The first rank of Local Leaders lets you set up supply lines. To establish a supply line, select a settler, then choose a secondary settlement. From then on, those two settlements will be linked and share supplies. Eventually, you can connect your entire network of settlements across the Commonwealth.
Stores
Before you can build any stores at your settlements, you need the second rank of the Local Leader perk. That requires level 6 Charisma and for you’re Sole Survivor to be at least level 14.
Once unlocked, you can build six kinds of stores:
- Trade
- Weapons
- Armor
- Food and Drink
- Medical
- Clothing
Stores are easier said than done to manage. In addition to Local Leader rank 2, some will need other perks like Cap Collector or Medic. You will also need your settlements to be very happy and have a lot of settlers.
Each store comes in three standard tiers. The better your settlements are, the higher tier store you can build. Higher-tier stores provide more benefits.
You can assign any settler to a store, but in the Commonwealth, there are a handful of special NPCs the community knows as tier 4 merchants. You will mostly find these NPCs in random encounters.
If you successfully recruit them, they can become merchants at your settlements. If you assign them to the store they specialize in, they will upgrade the store to tier 4.
Tier 4 merchant-manned stores have better inventories and increased chances of having legendary weapons and armor in stock. Recruiting tier 4 merchants isn’t easy and requires settlement population minimums, but it is well worth the effort.
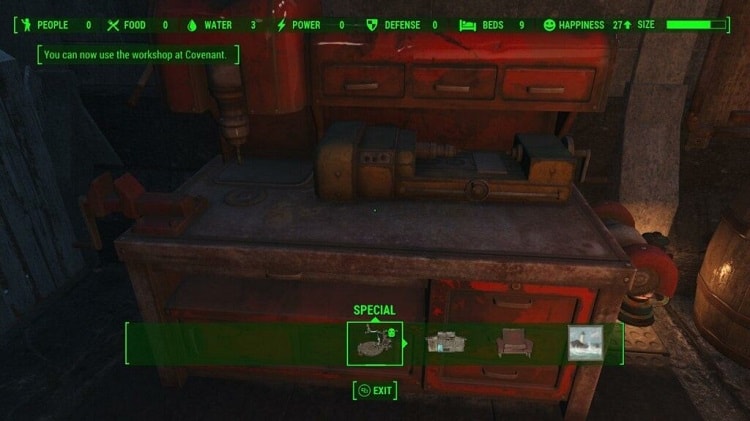
Junk & Crafting
To build anything in the Workshop, you need to craft them. And to craft anything, you need junk.
Most items you find in the wasteland fall under the junk category. You can store junk in your workshop or break them down into raw components. Either way, junk is necessary to improve your character or settlement in almost any way. The Scrapper perk goes a long way to ensuring you never run out of crafting materials.
Crafting is a vital part of Fallout 4, and it allows you to do everything from expanding your settlement resources to modding weapons and making drugs. You can build items for your settlement anywhere in your settlement while in Workshop mode. Crafting specific items requires you to utilize different crafting tables.
- Weapons workbench: Used to scrap and modify weapons.
- Armor workbench: Used to scrap and modify armor and clothing.
- Power Armor station: Used to repair and modify power armor.
- Cooking station: Used to create food and drinks.
- Chemistry station: Used to create chems, explosives, and traps.
- Robot workbench: Used to create and modify robots.
Check out our Crafting guide for all the in-depth need-to-knows about everything Crafting in Fallout 4.
Food, Drinks, and Chems
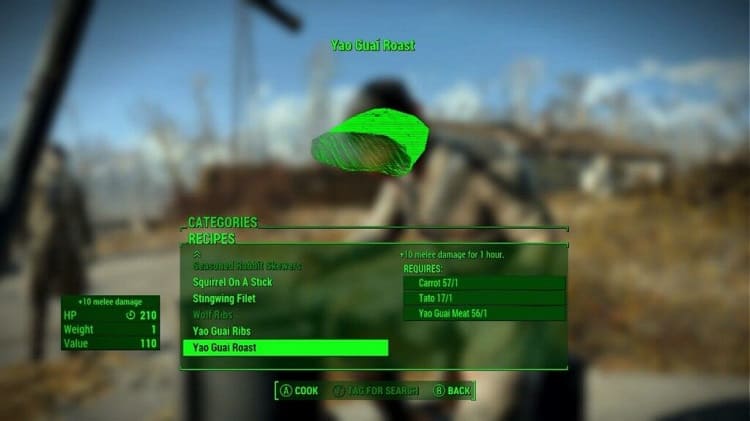
Food, drinks, and chems are the primary consumables in Fallout 4. These items can restore your HP, AP, or provide temporary buffs.
Chems are the most powerful consumables, but also the riskiest. There’s a chance you become addicted to chems every time you use them. Once addicted, you have to cure your addiction or continue using that chem or you’ll suffer withdrawal effects.
Pre-war food and drinks are the worst as they typically heal for less HP or have significant amounts of radiation. The food you create at your cooking station has the most beneficial effects and few to no side effects.
Power Armor
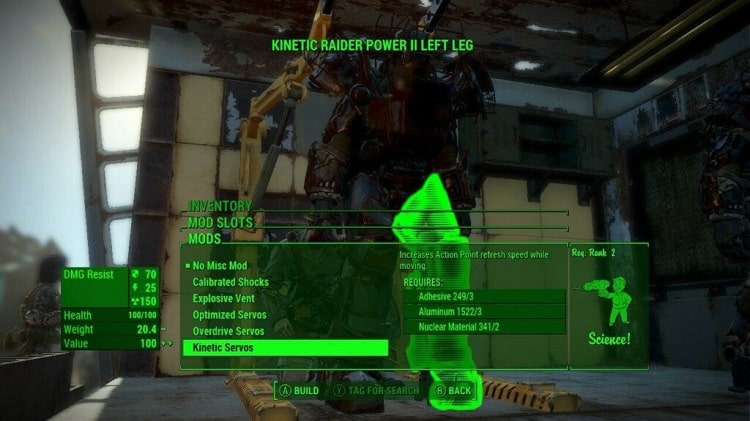
Power armor functions as exoskeletons in Fallout 4. You power up power armor via fusion cores. While in power armor, you have increased Strength, carry weight, and are immune to fall damage.
Any action that uses Action Points, such as Power Attacks, running, or jetpacks, will drain your fusion core’s juice much faster. Carry around a minimum of several fusion cores if you plan on being away from home for a while.
Armor and Clothing
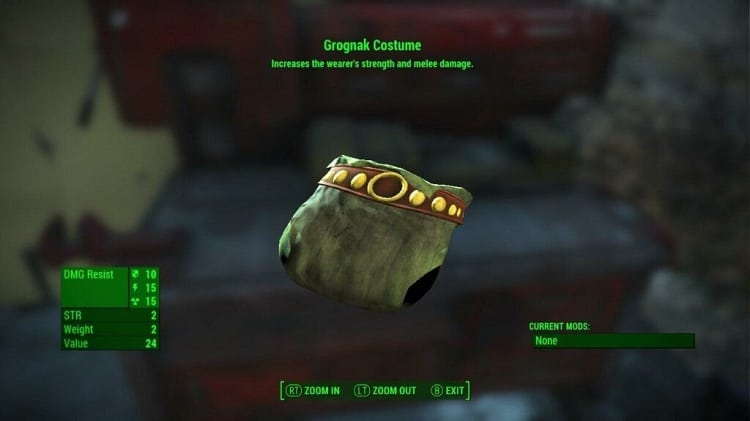
Armor in Fallout 4 is modular, which allows you to mix and match pieces for your preferred loadout. Some armor pieces have strengths over others, and you may want to change up your armor depending on the types of enemies you plan on facing.
Combat armor is better overall than leather armor, but leather armor has better energy resistance. If you’re going to take on a battalion of synths, leather armor is very useful.
Certain pieces of clothing are light enough to wear under your armor. Clothing doesn’t provide major defensive bonuses until you unlock ballistic weave, but can still be useful by providing S.P.E.C.I.A.L. bonuses.
Weapons
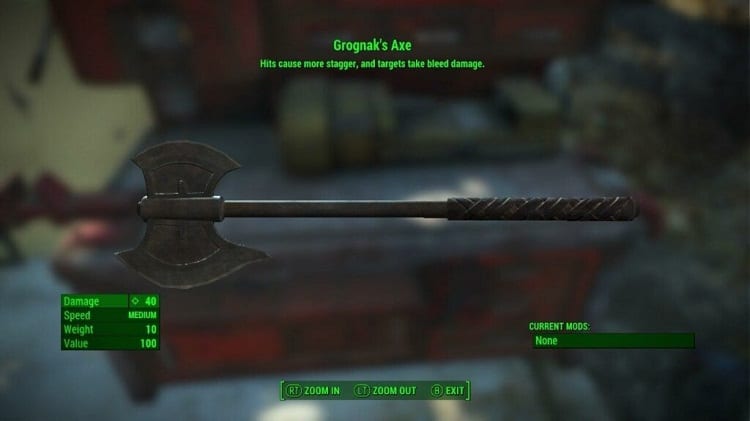
Unarmed, Melee, and Ranged Weapons in Fallout 4 are heavily modifiable. Weapon mods range from sensible, like giving your sniper rifle a longer scope, to outlandish, like attaching a rocket pack to a sledgehammer.
With the right perks and junk, you can greatly increase the combat potential of your arsenal through mods.
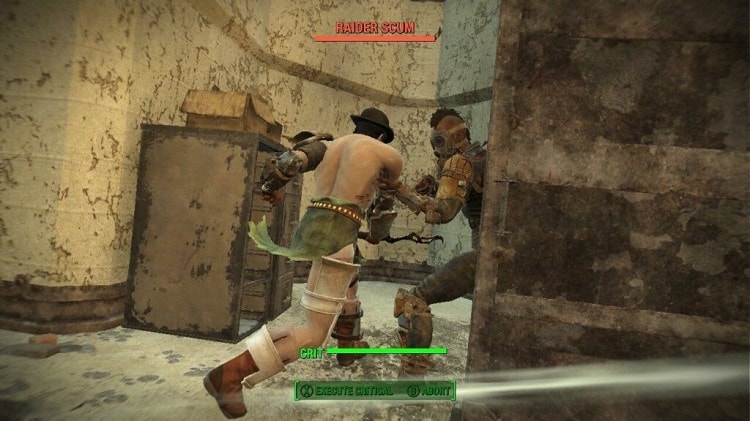
Combat
Fallout 4 heavily revamps the real-time combat of Fallout 3. You can engage in combat in either first-person or third-person. While their skills no longer exist, your combat options remain the same: Unarmed, Melee Weapons, Small Guns, Big Guns, Energy Weapons, and Explosives.
You can fire down sights or from the hip with ranged weapons. You can also utilize a rudimentary cover system for protection. Unarmed and Melee Weapons have some special moves that can give you an advantage over opponents. If you and your enemy are fighting Unarmed or in Melee, use block to mitigate some damage.
Explosives are simple. If they’re mines, drop them and wait for enemies to pass over them. If they’re throwable weapons, let em fly.
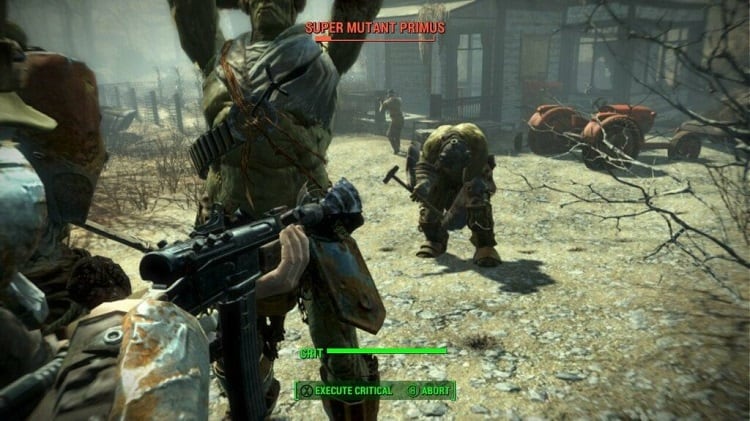
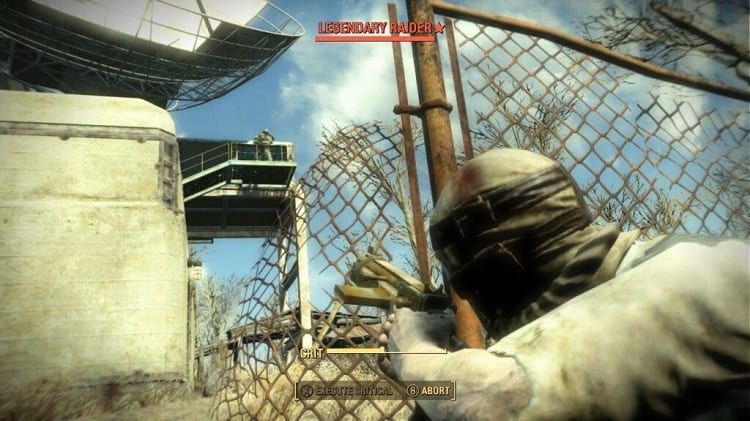
V.A.T.S.
The Vault-Tec Assisted Targeting System, V.A.T.S., is an essential combat tool in Fallout 4. While active, time slows down significantly and you take decreased damage. If you are using ranged weapons, you can use V.A.T.S. to target specific body parts, such as the legs, to prevent an enemy from running away.
You can use V.A.T.S. with Melee Weapons, but you cannot target specific body parts. You can target explosives while in V.A.T.S. but cannot use them in V.A.T.S.
Using V.A.T.S. costs Action Points. You have set percentage chances of hitting targets while in V.A.T.S., which you can increase by getting into a better position, certain legendary effects, and perks.
Once you have a full Critical Hit meter, you can enter V.A.T.S. and land a guaranteed crit on a target no matter how low your hit chance is.
Enemies
Fallout four has a myriad of terrifying creatures, human or otherwise. Each enemy type has tiers, with players encountering higher-tier enemies as they level up.
Enemies have varying strengths, weaknesses, and resistances that you need to be aware of at all times. Super Mutants and ghouls are resistant to radiation damage, and robots are susceptible to pulse weaponry, for example.
After reaching level 6, you will begin to encounter what is known as legendary enemies.
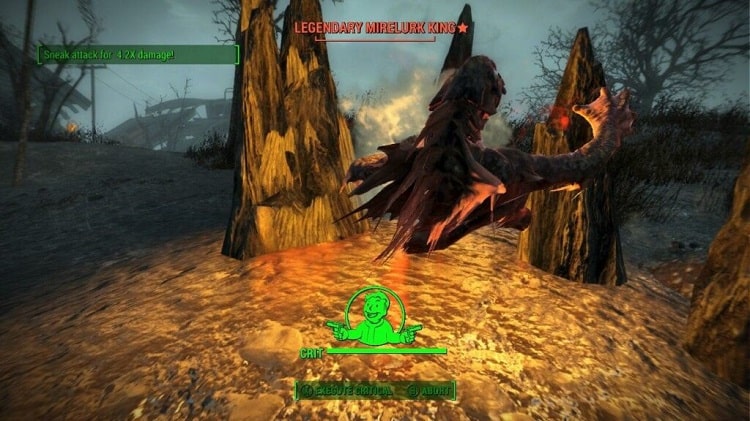
Legendary Enemies
Legendary Enemies are unique variants of nearly every enemy type in the game. They have more HP and are stronger than their non-legendary counterparts.
After dropping below 50% HP, legendary enemies mutant and regen to full HP. You can prevent this by killing them before they dip below 50%.
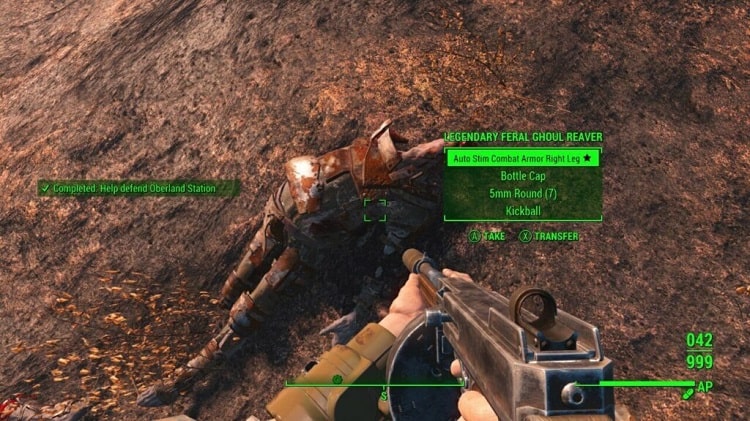
Upon death, legendary enemies will drop a legendary weapon or armor piece. Legendary gear is stronger than standard gear, so taking down legendary enemies whenever possible is highly recommended.
Companions
The Commonwealth is a rough place to face alone. Luckily, you don’t have to (Unless you want to. But even with The Lone Wanderer perk, you can at least bring along Dogmeat).
Fallout 4 has a healthy selection of companions you can recruit. Most are easy to encounter and recruit, but some require you to complete a quest first.
Companions start with their own weapons. With these starter weapons, they have unlimited ammo. If you give them any other weapon, you’ll need to keep them stocked on ammo yourself. Most companions have little to no armor, but you can provide most companions armor yourself, so it’s not a big deal.
Some companions have special talents you can call upon while in the wasteland. If a terminal or lock is too tough for you to crack, your companion might be able to pull it off.
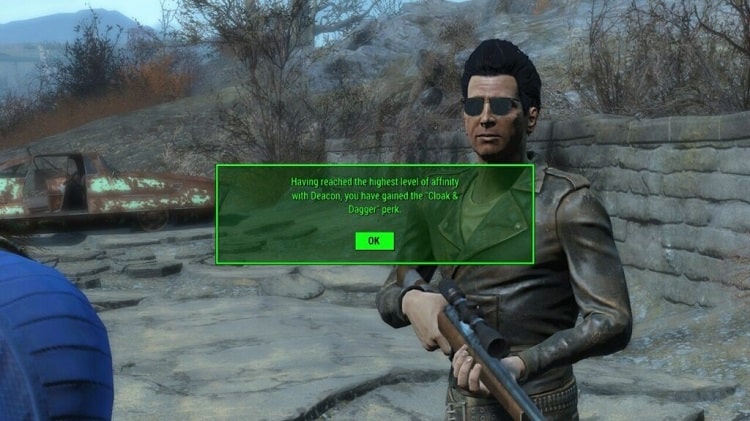
Every companion has likes and dislikes. Do things that they like, and they will grow closer to you. Do things they dislike, and they’ll start to hate you and eventually leave you.
Max out a companion’s affinity by continuously doing things they like, and you may unlock a special companion quest and finally earn a companion perk. Some perks are pretty useless (Sorry Nick Valentine), but most are quite potent.
Hacking Terminals
Hacking terminals is one of two skill-centric minigames in Fallout 4. You can use terminals to bypass security measures, obtain passwords for other terminals, or get backstory or exposition for characters and locations of the wasteland.
Terminals have four difficulty levels: Easy, Advanced, Expert, and Master. Everyone can hack Easy terminals, but the other terminals require the respective rank of the Hacker perk.
Terminal hacking is a simple process of elimination. One of the words on the screen is the correct password. Pick any word, and the system will tell you the likeness if the word isn’t a correct match.
Whatever number the likeness is, 4, for example, is how many letters in the word are in the right place. Hacking is a simple matter of finding the correct word.
You can remove duds from terminals to give yourself more hacking attempts, but it doesn’t really matter if you fail. If you lock yourself out of a terminal, you just need to wait 10 seconds before you can try again.
Lockpicking
Lockpicking is the second skill-centric minigame of Fallout 4.
Like hacking terminals, there are four tiers of locks: Easy, Advanced, Expert, and Master. You can immediately pick Easy locks, but the rest require their respective rank of the Locksmith perk.
Lockpicking is simpler than hacking terminals. All you need to do is use a bobby pin and jimmy around until you find a lock’s sweet spot. After that, pop it open, and you’re home free.
Early on, Expert and Master locks can be very annoying to pick, and you may want to have some safecracker armor pieces lying around to help you through it. But after a while, picking locks becomes second nature.
FAQs
Question: What is the Best Companion Perk to Get First?
Answer: Piper’s. Piper’s companion perk doubles XP gains when you discover new locations. That significantly speeds up the leveling-up process.
Piper’s perk is also on a time limit since if you discover most locations on the map before getting it, then it borders on being worthless.
Question: I can’t Find the Tier 4 Merchants anywhere! What Gives?
Answer: Most T4 merchants are random encounters. That makes them fairly annoying to find. And if you don’t have their recruitment requirements when you find them, you’ll need to locate them all over again.
Once you meet their recruitment requirements, refrain from fast traveling and rotate through some areas on the map with a lot of random location spawn points. And when you find one of them, for the love of Elder Maxson, save your game.
Question: How Quickly should I Start Investing in My Settlements?
Answer: I recommend avoiding starting up more than one settlement for a while.
And by a while, I mean 100+ hours.
Settlement attacks and requests honestly get very annoying. Even with high defense, they happen fairly frequently. We’ve all seen the Preston Garvey memes, but you don’t understand the pain until you experience it yourself. I find it drags down the experience.
One time, I wanted to go to a particular location to do a quest, but I had to help eight settlements in a row before I could get back to what I was doing.
Conclusion
As I previously mentioned, we have a wealth of extensive Fallout 4 guides here on WastelandGamers. But this guide is more than enough to set you well on your way as you experience the Commonwealth for the first time.
I actually recommend refraining from developing encyclopedic mastery over every gameplay element of Fallout 4 straight out of the gate. You only get to experience video games for the first time once, and I would hate to ruin that part of the gaming experience by getting carried away with the guide here.
That said, my work here is complete. Good luck, and have fun in Fallout 4!