
- Games Like Fallout New Vegas - January 2, 2023
- Best Fallout Themed Hoodies Guide - June 21, 2022
- Best Fallout Toys: Buying Guide - April 21, 2022
Fallout 4 is an awesome game, and despite what some hardcore purists say, it’s easily one of the best games the franchise has to offer. When it comes to exploring a post-apocalyptic nuclear wasteland, you might have a few games that explore this particular topic, but none reach the highs of Fallout 4, and the game world of the Commonwealth is one of the most chilling and enthralling journeys you can take in a game.
I’ve always been a fan of Bethesda games, so when I had my first taste of Fallout with Fallout 3, I knew I was immediately hooked, and every subsequent Fallout release, I’ve been sure to pick up on release date. Fallout 4 was such an awesome change of pace for me as the added third-person view combined my favorite point of view in video games with an incredible game world and hours upon hours of content to experience.
Now, the experience can be lengthy all the more with tons of mods and DLC as well. Whether you’re just wandering the Wasteland alone or taking along a party of colorful characters, Fallout 4 proves to be a memorable experience each time you decide to play.
While it’s open to exploring at your leisure, guiding you along in the world are tons of quests, both optional and integrated with the main story to push you along. Your journey tasks you with finding your son Shaun, so the main quest is going to take priority, so that’s going to be the area we’ll be focusing on here.
Out of Time
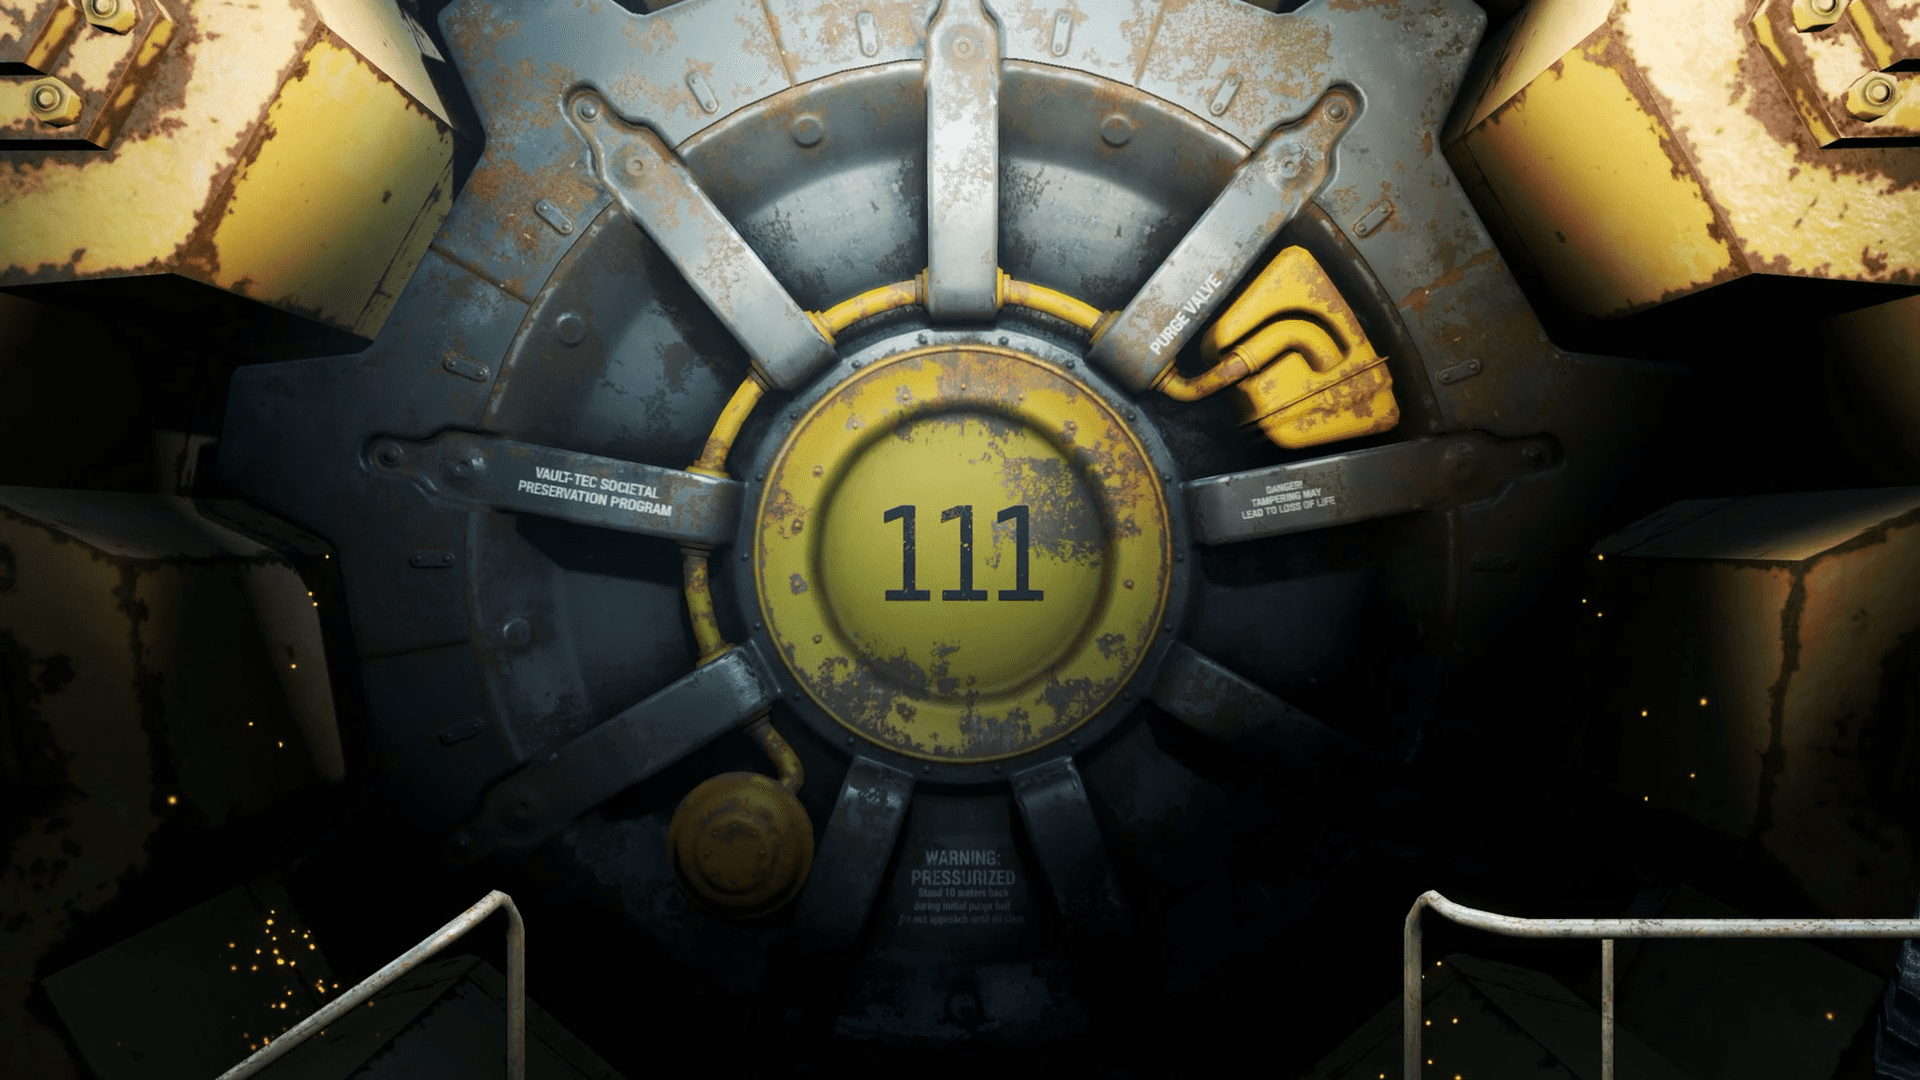
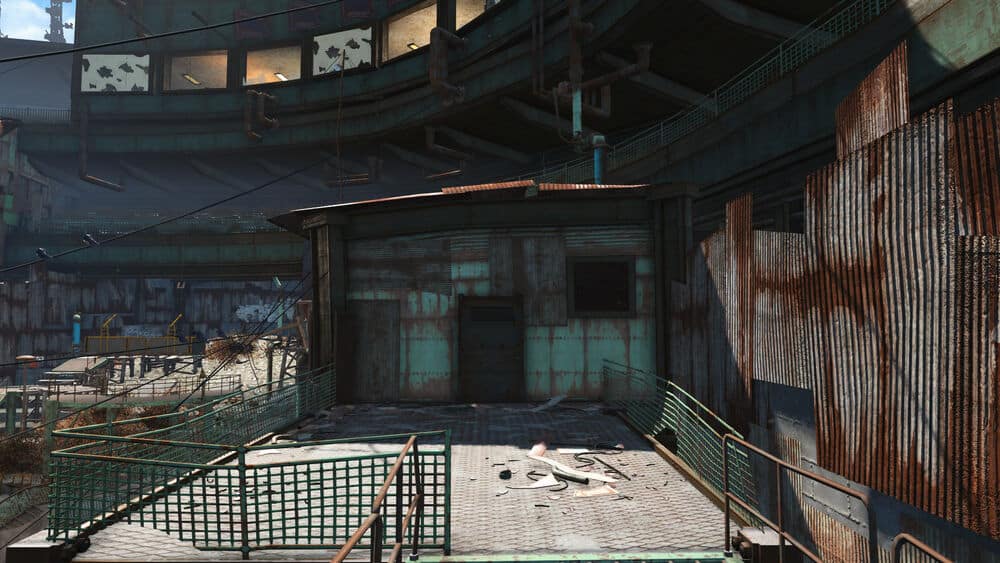
After the lengthy intro sequence, you’ll find yourself awakened in Vault 111, alone in a mysterious new world.
Immediately, you’ll notice you’ve got nothing to defend yourself with at all. You’ll also notice your recently deceased spouse in the pod across from yours. You can use the lever on her pod to open it up and recover the item Wedding Ring from her body.
After that sad moment, you need to exit this room into the hallway. One of the most important parts of Fallout 4 is the item collection. You can begin your hoarding journey on the left-hand side Cryogenic chamber.
As you leave into the hallway, there are multiple paths. The one on the right leads you to the first of many terminals that you’ll encounter while playing. Reading the messages here will shed some light on your current situation.
On the desk nearby, grab the Stimpak and then head down the path to find a Baton laying on a crate. This is going to be your first weapon, so equip it quickly and get ready for a fight.
The most non-threatening enemy in Fallout 4 is going to be your first foe here, and that’s the Rad Roaches. While they’re not tough, they are plentiful, and we don’t have a lot of health yet, so we’re going to use the V.A.T.S. system to fight these. Once activated, you can target each Rad Roach while time is slowed, and you can take out each Rad Roach this way.
After the fight, move through the area into the cafeteria, being sure to loot everything you see along the way.
As you continue through the area, you will find the Overseer’s desk and on top of it is a 10mm Pistol. Equip this and also grab the Stimpaks you see too.
As you move throughout the area, you’ll reach another terminal, and when you open this, you’ll see a hallway infested with Rad Roaches. Steel your nerves and proceed carefully, taking out any Rad Roach you see with either the Baton or the gun you just picked up. Smart use of V.A.T.S. here will make sure things go smoothly.
After you defeat them all, head towards the vault exit. It’s here you’ll find a skeletal arm on the floor, and attached is a Pip-Boy unit. Pick it up, and you can finally exit the vault.
From this point, you can choose to respec your character one last time, or you can venture out into the Wasteland as you are. You have the ultimate freedom to explore in any direction you choose from this point, but keep in mind how weak you likely are and how little weaponry you have at this point. Instead of exploring on your own, continue towards the next quest marker.
Here’s a complete overview of everything you need to know about weapons in Fallout.
Following the marker here will take us to Sanctuary, the remains of a Boston suburb that has remnants of human life left. It is here you’ll meet Codsworth, a robotic butler, and he’ll lead you on a quest to kill some Rad Roaches and Bloatflies. These enemies can hit harder than the Rad Roaches and are tougher to hit since they fly, so take your time killing these enemies.
After this, you’ll be directed to Concord, aka an actual city that might have people in it. Along the way, you’ll pass by the Red Rocket Truck Stop. It’s here you’ll meet Dogmeat. This is your companion for life if you want him to be, and trust me, you will want him to be.
When Freedom Calls
It’s time to meet some actual people. Head to the Museum of Freedom, and you’ll see a Laser Musket on the ground outside. You’re going to want this right now as we’re about to have our first challenging combat scenario play out.
As soon as you enter the building, you’ll see raider bodies near you. It’s time to learn to loot bodies, and you’ll need everything they’ve got to survive the upcoming fight.
Continue through the Museum, and you’ll start encountering Raiders. There are a ton of readers here who want to destroy you, so take cover in a hurry and start lining up your shots. V.A.T.S. is important here as Raiders will be located on multiple different levels here. Along the way, make sure you loot every Raider you kill, as you’ll need all the ammo and equipment you can find here.
As you make your way throughout the Museum, you’ll eventually get to the top and encounter the wonderfully helpful and annoying Preston Garvey.
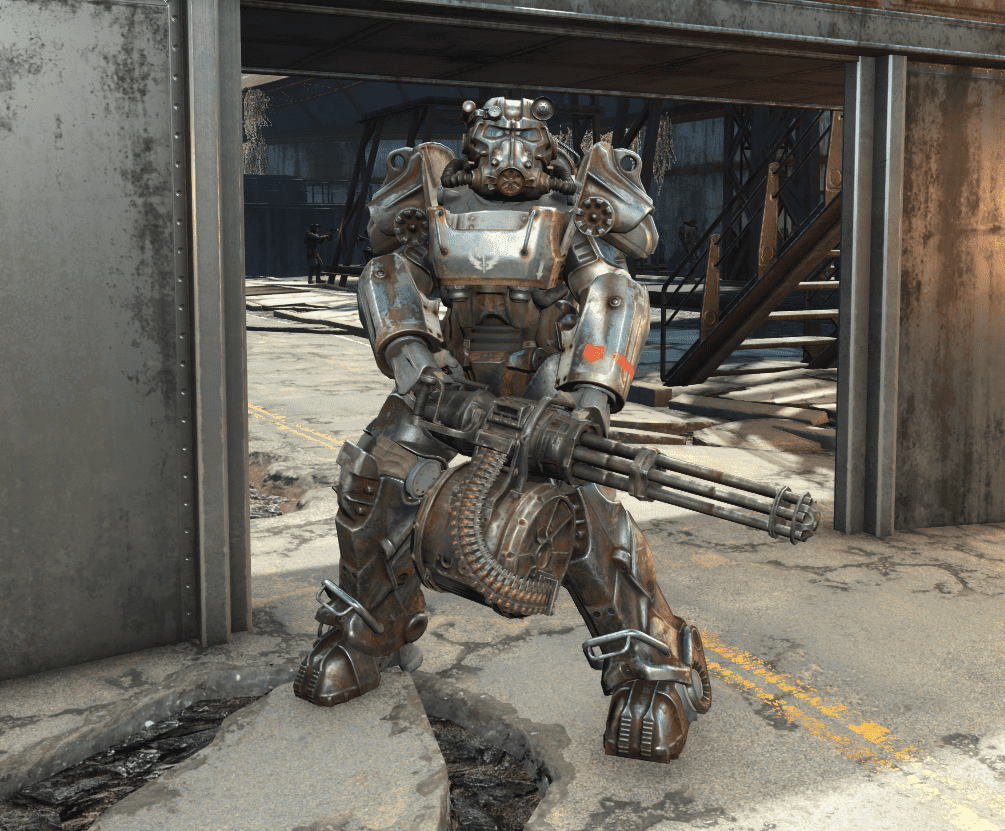
He’s the leader of the Minutemen, who you can choose to help out from time to time if you’d like, but for now, we need to complete a mission for him. This mission will direct you to the roof, where you will find the Power Armor.
In the Museum, you’ll likely have come across a core for the Power Armor. When you get to the roof, you’ll see the Power Armor and next to it, a helicopter with a minigun on it.
You know what to do, rip that bad boy off and get ready to fight. With the Power Armor in hand, you are a killing machine of the highest order. Your minigun will tear through the Raiders in your path like a hot knife through butter, so go nuts here and don’t worry about getting any cover; the steel suit of armor you have is all the cover you’ll need.
Make sure you’re still looting bodies left and right here, and eventually, a Deathclaw will appear. These guys are big and mean, and without your Power Armor, you’d be completely toasted.
In the power armor, though, you are formidable, and you’ll be able to use the minigun to take destroy the Deathclaw in short order. Use V.A.T.S. here to take out the Deathclaws chest here, and if you’re close enough, you can go for the head as well.
The Jewel of The Commonwealth
It’s time to explore what remains of human civilization, and that’s the beautiful hodgepodge that is Diamond City. Your trek there will be quite lengthy so along the way, make sure to stay away from any of the enemies that have red skulls above their heads.
The red skull means an enemy is way above your level, so while you can beat them with enough perseverance, pretty much a couple of hits will kill you when facing one of these.
Along the way, you’ll encounter Ghouls. These are essentially the zombies of this world, so that means they’re going to be ferocious and tough to kill. If you’ve seen zombie movies, you know how to take these guys down. Aim for the aim, and if you can’t manage those shots, aim for the legs.
Blowing the legs of these Ghouls will limit their ability to rush you. These Ghouls have a to loot on them, too, so don’t hesitate to get near the bodies after you’ve downed them.
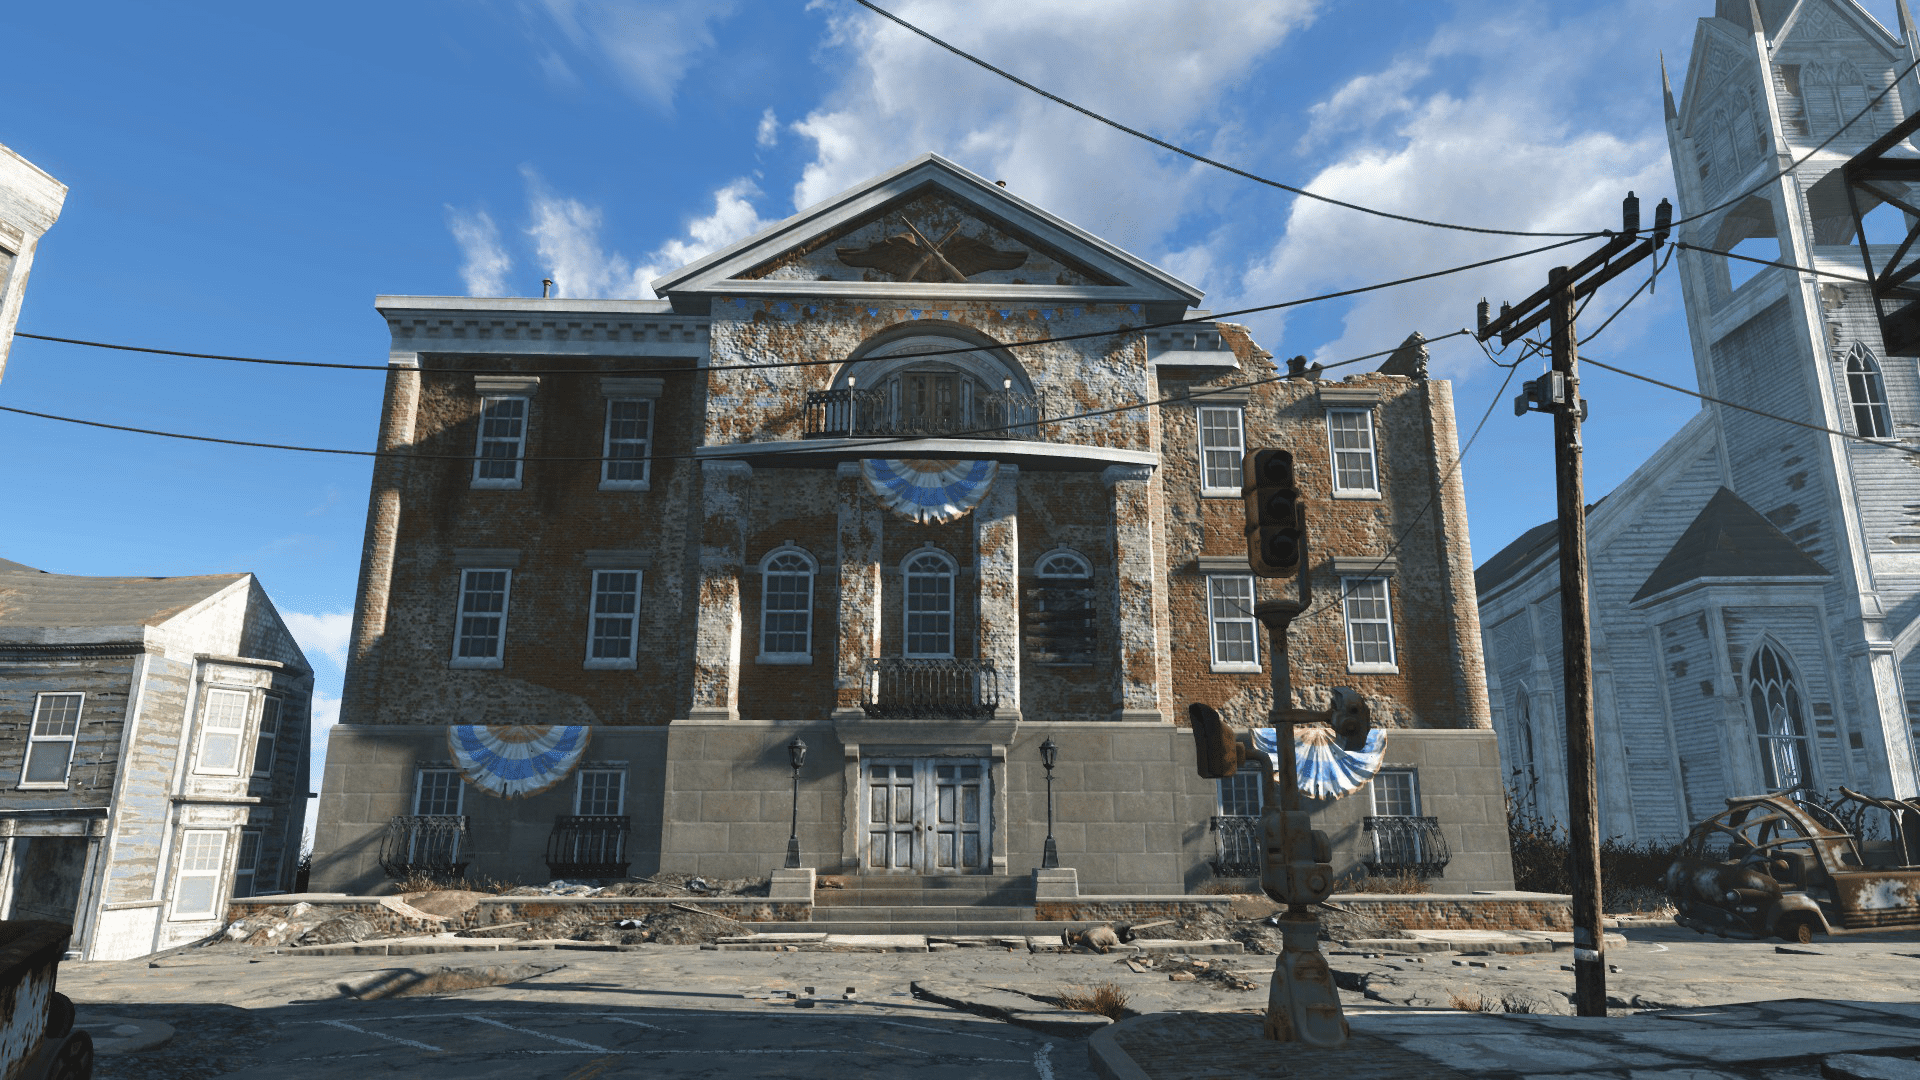
After taking on a few groups of enemies, you’ll get to Diamond City, an entire city built in the ruins of Fenway Park. Outside of the city, you’ll run into Piper, and she’ll need your help to bluff the guard and get inside.
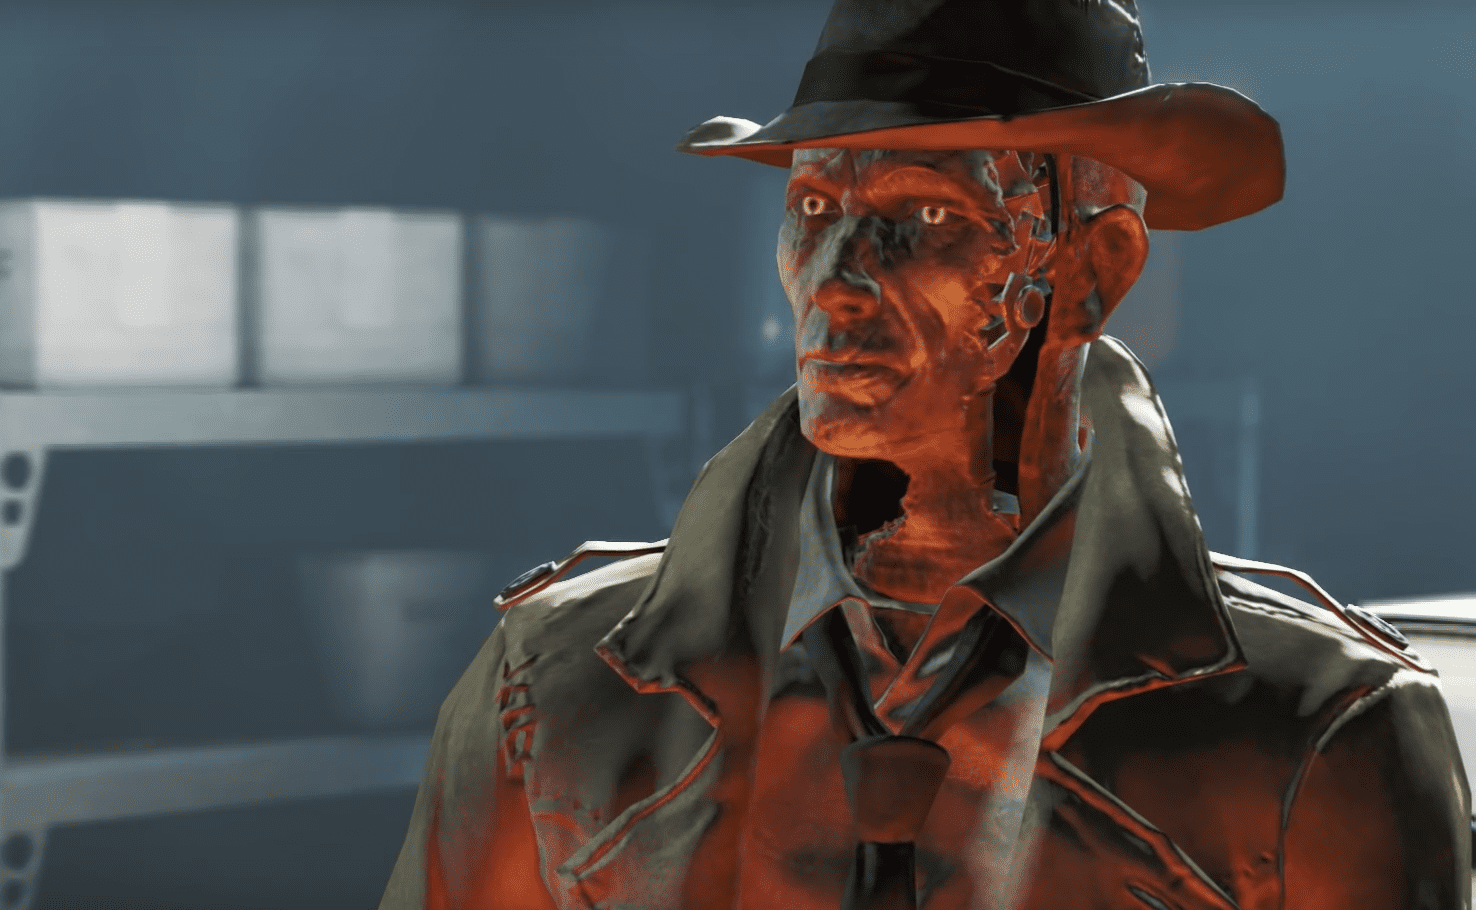
From here, you’ll meet the mayor of the town, and further questioning of him will get the information that you need. Nick Valentine is the guy you need to meet to help you find Shaun.
There is a chance the mayor doesn’t help you out here, and when that happens, you either need to explore Diamond City until you find him yourself, or you can ask random N.P.C.s until they give up the information on Nick Valentine’s whereabouts.
You’ll see Nick’s office sign is a bright red neon sign. Regardless of the path you take, once you get inside, you’ll meet Nick’s secretary, and it’s then that you’ll find out Nick has been taken, and it’s up to you to find him.
Unlikely Valentine
It’s time to track down our man. Following your Pip-Boy, you’ll end up in the Boston Common and find the subway station here. As soon as you head downstairs, get ready for a fight and a lot of them as it’s going to be filled with thugs from here on out.
They are called Triggerman, and they are the toughest enemies you’ll find, and they’ll be using machine guns and very damaging weapons. They have S.M.G.s that can rip you apart at close range, so use V.A.T.S. whenever you can here and aim for the gun arms. At worst, this will screw up their aim against you. At best, it’ll blow their arms clean off.
You need to be methodical here, and luckily, you have Dogmeat at your side; he will distract enemies here and be an invaluable ally.
Keep progressing down this area packed with enemies, and you’ll eventually make your way to the catwalk platforms. Follow the path around and then drop down into a massive chamber and kill the thugs outside. Use the terminal that’s here, and you’ll finally meet up with Nick Valentine.
Nick will start leading through the vault, and the two of you will have to fight tons of Triggermen. Take cover here and aim for the heads and legs if you can to slow them down. Hopefully, you’ve been collecting Stimpaks at this point, as you’ll likely need them here.
Eventually, you’ll reach the exit, and you’ll meet the boss, Skinny. Skinny will give you a Charisma check here, and if you pass the answer, you can diffuse the situation without having to fight. As long as you leave before he counts to ten, you’ll be fine.
If not, you’ll have a huge fight on your hands, and you should open up with an explosive of some kind to give you some time to take cover. From there, take the enemies out as you normally would and then book the site to the surface with Nick to complete the mission.
Getting a Clue
As soon as you return to Diamond City, you’ll start looking for clues as to where Kellogg is. First up, you’ll be checking out his apartment. If you can’t pick the lock there, then don’t worry, you can visit the mayor and either convince him to give you the key, or you can steal it from his safe. You can also speak to the secretary if you want to go that route as well.
However, you choose to get it, return to Kellogg’s apartment, and you’ll need to search the underside of the desk to find a secret button. Press it and then enter the secret room. Once you’re in here, you’ll find all sorts of stuff, but what you’re looking for is the cigars on the table.
Take these cigars to Dogmeat, and you’ll be onto the next quest.
Reunions
You’ll be taken on a scavenger hunt here to find the different clues that eventually will take you to Kellogg’s hideout.
Each time that you find a new clue, you’re going to have to fight several enemies, and these will consist of Molerats, Yao Guai, and 3 Super Mutants.
At this point, these fights shouldn’t phase you much, so take them out as you do with anything else.
Dogmeat will eventually take you to an area called Fort Hagen, and this is where you will end up finding Kellogg.
You need to make sure you’re equipped to the teeth for this mission because you’re about to fight an enormous amount of synths that are all armed with laser weapons. Make sure your armor can handle this because you’ll get caught up in the crossfire of these enemies early and often in Fort Hagen.
As soon as you enter, you’ll be swarmed with enemies, and you’ll need to direct Dogmeat around here to take out as many enemies as he can handle while you deal with the others.
Head to the lower levels of this establishment, and you’ll find a bunch more Synths, and eventually, you’ll come to a terminal. Once you open it, you’ll start getting taunted by Kellogg over a loudspeaker.
Keep following the path and fighting through the groups of Synths, and you’ll eventually find yourself in a boss fight against Kellogg.
This fight is incredibly tough, and any chance Kellogg gets to take shots at your head, he will take, so you need to be clever here, and hopefully, you’ve got a lot of explosives on hand.
At the start of the fight, aim for the Synths he has by his side. Dogmeat should be distracting Kellogg while you deal with Synths, and once they’re all down, that’s when you can focus on Kellogg.
If you’d happened to pick up the Fat Man mini-nuke launcher in Fort Hagen, then you can take a shot here and pray you don’t get blown up in the resulting blast.
Loot him after he’s dead, and you’ll get some awesome armor and weapons. You’ll also need the key he has as well.
Go to the computer and open the doors, but before you leave, read his data entry. Then take the elevator you used to come downstairs and head outside. You’ll see the Brotherhood of Steel fly overhead, but you don’t need to worry about them for now; that’s side quest related, and we’re powering ahead on the main path.
Dangerous Minds
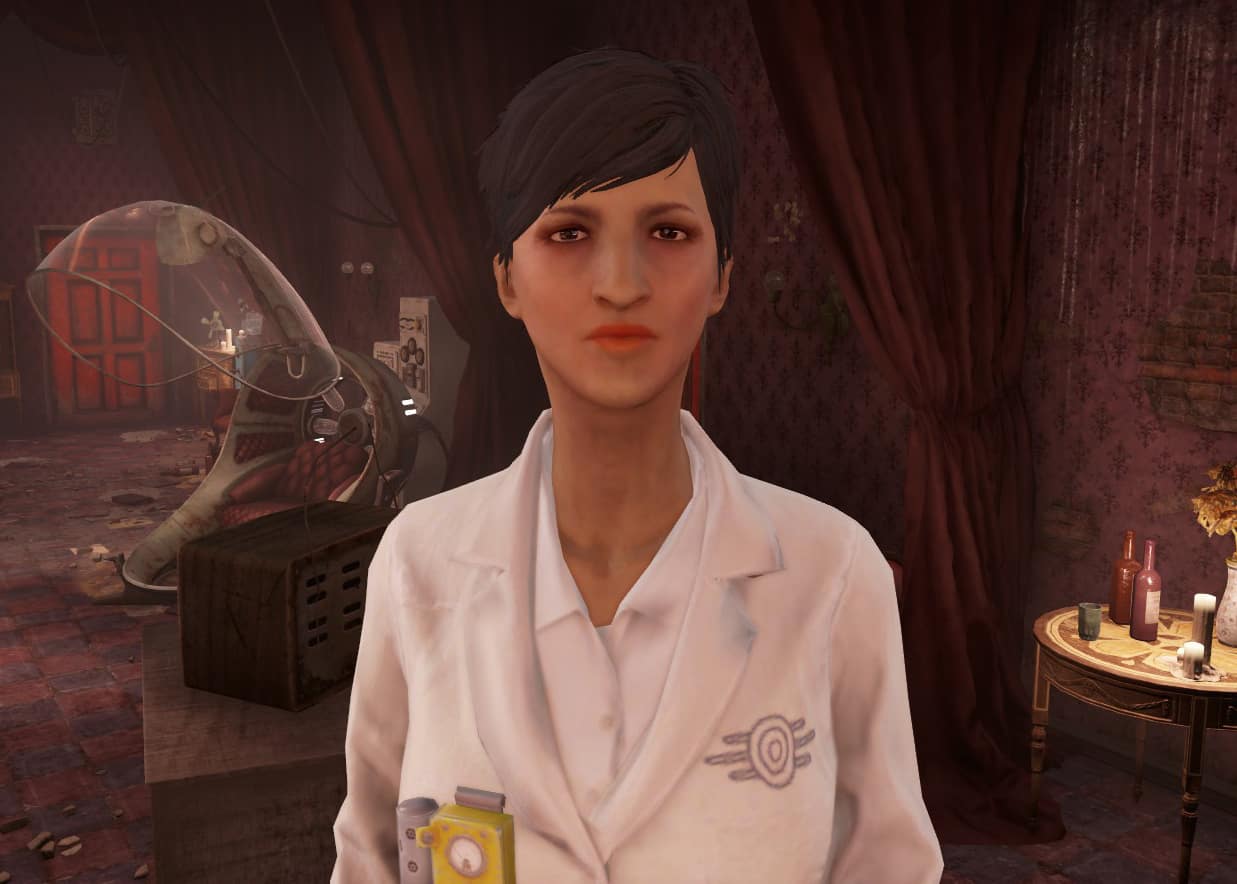
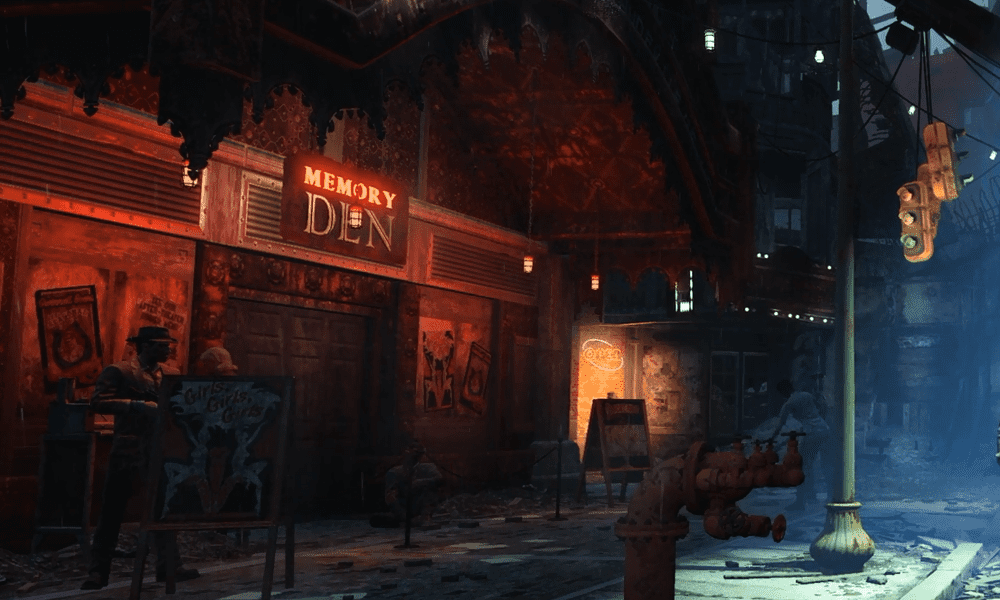
In this segment of the story, we need to go to the lovely town of Goodneighbor and find Dr. Amari.
This is a rough town, and if you make the wrong move here, you’ll find yourself killed in an instant from the tons of different hostile characters here. Work your way around the town until you get to the swanky establishment called the Memory Den.
Once in here, you’ll find Dr. Amari, and when you do, you’ll be tasked with going inside the mind of Kellogg. Luckily, you picked up his brain chip, and that’ll allow you to tack into his mind.
This next segment is truly bizarre as you’ll be traveling inside of Kellogg’s memories and experiencing everything that led him to the Institute. You will travel from brain stem to brain stem as you see different events play out until you finally get to the memory that involves your son, Shaun.
You’ll discover that he’s been taken to the Institute via a teleporter, and just like that, you’ve discovered how to get into the Institute. You’ll also discover that Kellogg was sent to take out a rogue scientist but never finished the job, so guess where you’re headed next?
The Glowing Sea

To track down this rogue scientist, you’re going to head to Glowing Sea. While you might’ve come across this area in your exploration, it’s unlikely you survived there that long. The Glowing Sea is the most dangerous area in all of Fallout 4.
Because of this, you’re going to have to be packed to the gills with one of two things. You will need radiation protection or Power Armor. For radiation protection, you can gather tons of items like Radway to keep yourself safe from the nuclear radiation that poisons the Glowing Sea. You’ll also need a ton of Stickpaks to heal yourself as the enemies in the area are seriously powerful.
If you decide to go the Power Armor route, you will likely need to do some maintenance on it first. While the Power Armor is incredibly strong, it does take damage, so if you left the Power Armor in Concord all those hours ago, you’d need to take it to the workshop to get it fixed up.
You’ll also want to make sure you have minigun bullets as well as the enemies in the Glowing Sea are all going to be high level, and you can expect everything from Deathclaws to Irradiated Ghouls here.
Once you’ve decided on the path, you’re going to take, head out into the Glowing Sea and take your time along the way. You can save while in Power Armor, so don’t be afraid to do this from time to time, as each fight is likely to be tougher than the next.
Even in the Power Armor, you’re going to take some radiation damage as the pieces of your suit get weakened, so keep moving any time you’ve finished a battle.
This is not an area to sightsee. As you get closer to the objective on your map, you’ll approach a small settlement area inhabited by the Children of Atom. You will speak to a woman here who will give up the location of the scientist you’re looking for.
The radiation is still very apparent here, so head towards the cave as quickly as you can. Along the way, you will probably come across a Deathclaw. I would advise not fighting it at this point and just beelining it to the cave. The Deathclaw won’t chase you all the way there.
Once in the cave, walk calmly past the friendly turrets, and you’ll meet Virgil, the rogue scientist who happens to be a Super Mutant.
He’ll send you on a mission to go kill a courser and analyze the chip inside it.
Hunter Hunted

It’s time to go find one of the most dangerous enemies in Fallout 4.
To find one, though, we’re not just given the exact location we’re looking for this time around. Instead, we have to head to a location called the C.I.T. Ruins, and from there, we need to start following the Courser signal that pops up on the screen.
Following the signal is fairly easy, but you need to be wary as there are tons of enemies in this area, all of which are pretty powerful.
You will eventually follow this signal to the Greentech Genetics building, and it’s here where you’ll find your Courser.
That’s not going to be for a while, though, as first, you need to fight your way through the litany of Gunners that inhabit the place.
These enemies are armed well and can have everything from shotguns to rocket launchers, so you need to be very careful here and save often. There are also tons of turrets and traps lying about, so one wrong move can cause a lot of damage here.
Make your way carefully up each level, and eventually, you’ll get to the top floor where the Courser has some Gunners held hostage.
This fight is very tough, but again, Dogmeat is a godsend here and can distract him while you take your shots.
Once you’ve won the battle, loot his body, and you’ll be onto the next quest.
The Molecular Level
Now we’ve got our Courser Chip, we need to get it analyzed, so it’s back to the Memory Den in Goodneighbor to see what the good doctor has to tell us.
Once you get there, she’ll tell you this is beyond her abilities, and instead, you’ll be directed to find the Railroad by following the Freedom Trail.
In the Boston Commons area nearby, you’ll find an area with a Protectotron, and near it will be a sign that says “The Freedom Trail.” From here, follow the red line the entire way.
You might get lost from time to time, but just retrace your steps to the last place you saw the red line, and you should have no trouble.
You’ll eventually come to a church and inside, head to the basement, and you’ll see a gold mural on the wall, press it, and you’ll have to spell the word Railroad, and once you do that, it will open.
Once inside, you’ll be led into the secret base, and there you will get the chip analyzed, and eventually, you’ll be sent back to Virgil.
He will build you the device you need, and after that, you will need to choose a faction to help you out from there.
There are several options of factions you can choose from in the game, so now is the time to explore those options.
Once the device is built, you’ll finish the quest.
Institutionalized

Once you’re inside, a voice will start talking and will lead you down a path ahead of you.
You’ll eventually encounter the Father and have a long conversation with him. Then you will have to talk to everyone there and gather more information.
You can also complete this quest by killing the Father, though that will lead to a completely alternate ending.
Synth Retention

Go and speak with Father again, and you’ll be sent on a mission to find a synth who has gone rogue. You’ll be tasked with meeting up with a Courser first to team up with you.
Once you join up, the two of you will head towards the Raider camp. These guys are a bit tougher this time around, so be careful as their weapons can do some serious damage.
When you get to the cabin, you have the option to use the code the Courser gives you to shut down the Rogue Synth, or you can kill him and his cohorts.
When you’re done here, loot the area and head back to the Father.
The Battle of Bunker Hill

This is a lengthy and tough quest that will have you sent to recover some stolen Synths. You will be sent to meet up with a Synth and once that happens, a massive battle will breakout featuring the Brotherhood of Steel. The majority of the fighting will be Synths vs. the Brotherhood, so just hang back and watch the fireworks if you can.
These enemies have a ton of powerful weapons, including Gatling Guns and Gatling Lasers, so you should avoid confronting them directly if you can.
There will be some branching storylines here involving what to do with the Synths, and after, you will meet up with the Father again.
Mankind Redefined
This is a short quest that will have you go into the Institute and attend a meeting. This is a long segment with a lot of dialogue, so just wait until the end of it and speak to Father again. The mission will end after you do so.
Mass Fusion
This mission will send you to find an item to help the nuclear reactor work better.
Go to the relay, and there will be warned that what you do from here will make you a permanent enemy of the Brotherhood of Steel.
This would be the time to complete all of their quests first if you care about your standing with them.
As soon as you enter the relay, you’ll enter a fight with the Brotherhood. Once defeated, you’ll need to find a few passwords hidden inside a desk.
Go to the computer that your objective marker points you towards, use the codes, and then read the various entries to find the item you seek.
It’s underground, so go to the elevator and head lower.
Tons of enemies are down here, and you’re going to have pretty much nowhere to hide, so equip your best guns and get ready for an intense fight.
Keep fighting your way through the area, and you’ll find an elevator on the lowest floor. Once you’re there, Allie will tell you she will wait while you continue.
Before you go into the core, go to the small room on this level and pick up and equip the Radiation Suit as being here will cause tons of rads damage.
Once you’re inside the core, go to the console, press the button and take the Agitator. Once you do this, lockdown happens, and high defenses will be set up.
Escape the turrets here and head towards the exit. Once you exit the area, a hostile Sentry Bot will be waiting, so use anything you’ve got to take him out. Explosives help a lot here, so hopefully, you have a few on hand.
After you defeat it, leave the area, and the Brotherhood will come at you once again. This is a tough fight as the Brotherhood is insanely powerful, and each member can kill you if you’re not careful.
Take your time isolating each enemy, and you should be able to survive this fight.
After it’s clear, exit out of the area, head back to the Institute and speak with Allie to end the quest.
Pinned
Speak with Father, and he’ll send you on a quest to find a man named Wallace who has been invited to the Institute.
Travel to the location he’s at, and you’ll encounter a bunch of Gunner enemies patrolling around. These guys are sinch at this point, so take care of them and head into the house to meet Enrico.
Talk with him, and you’ll find Wallace’s location, and once you talk to him, you need to convince him to join your cause.
Once you manage that, the next quest will begin.
Powering Up
Head back to the Institute and speak with Father. You’ll now be told that as the new Director, you’ll need to record a message for the Commonwealth.
You can customize this message however you’d like based on how you’ve been playing up to this point.
Talk to Father again, and you’ll get instructions for how to broadcast it.
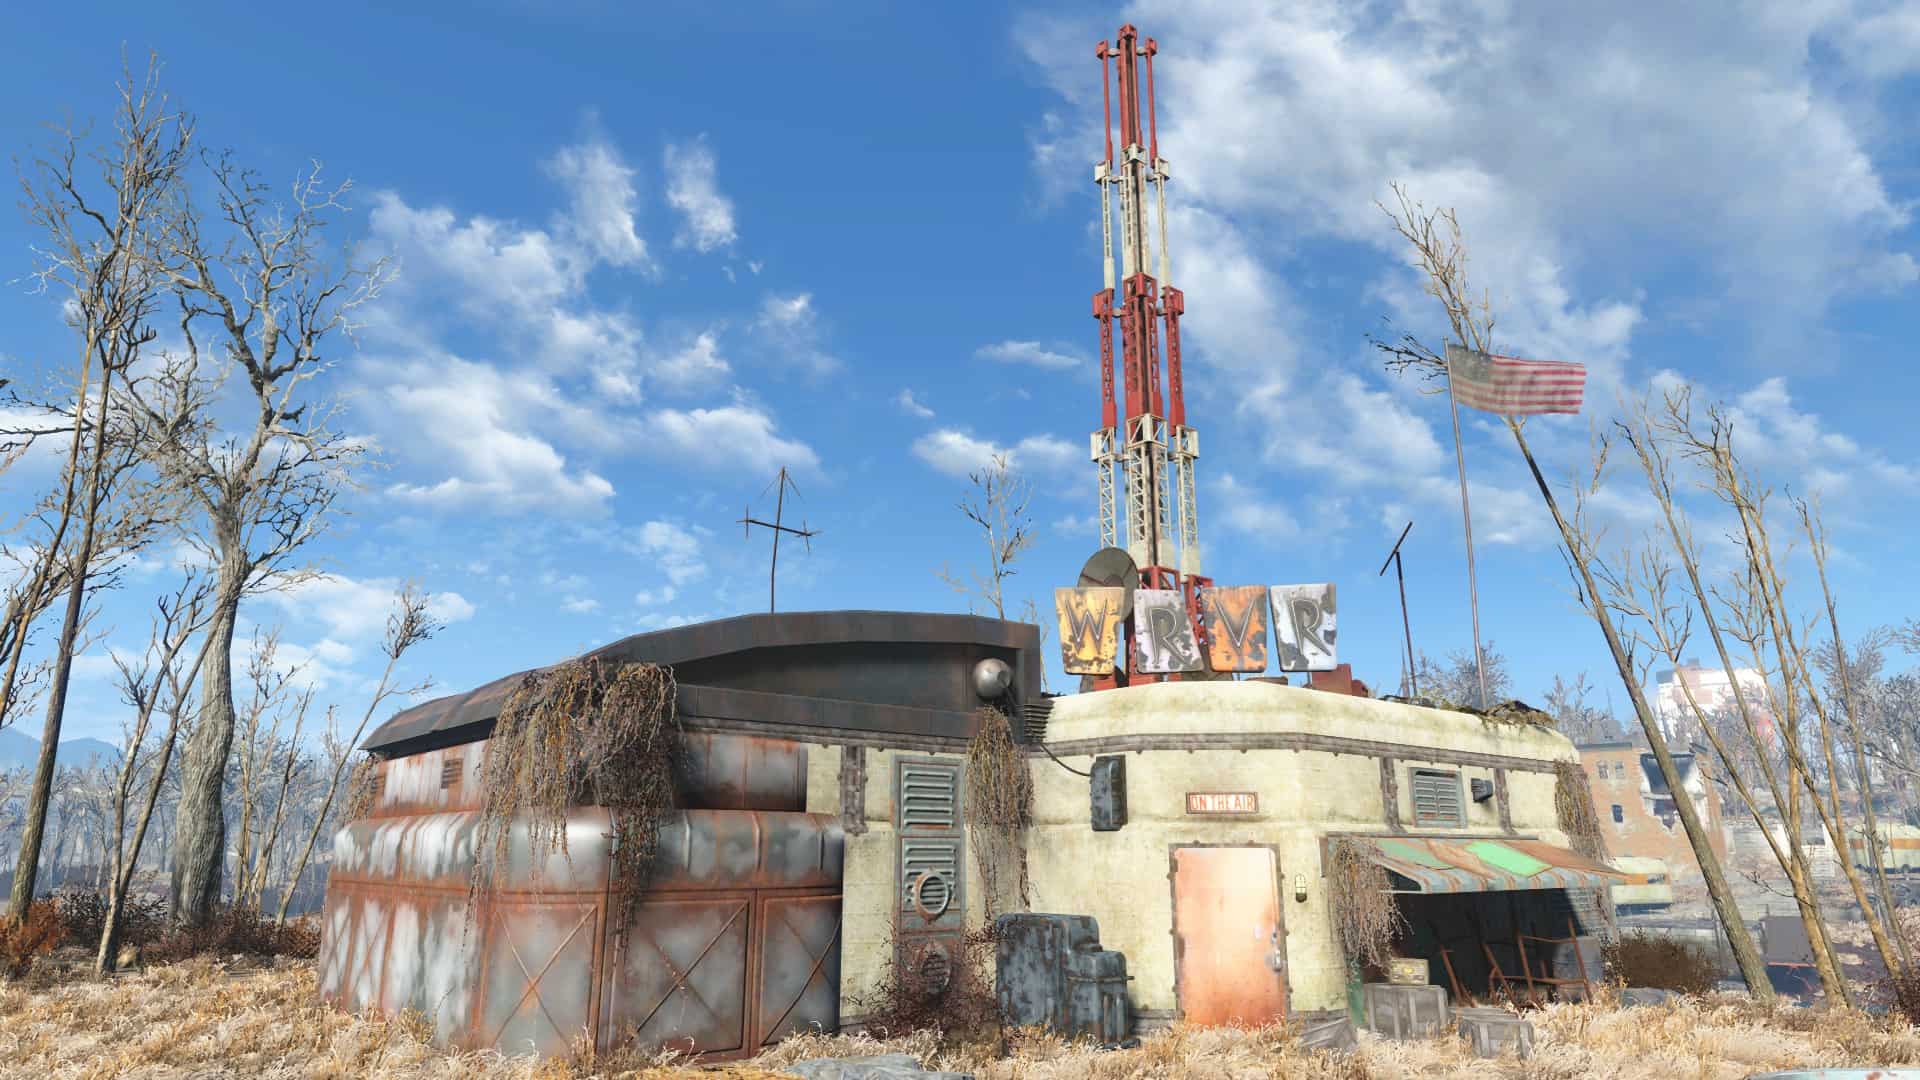
Go to Diamond city and head over to the radio station, and there, you’ll see that below the console is a metal box with three components in it.
Slot each one into the machines until all the green lights light up.
The trick to doing this is a certain order. Buttons on the left. Dials in the center and tubes on the right are the correct combo.
Power this up and return to Father. Turn on the reactor in this area and speak to Father again.
Here, you will have to make some big, game-changing decisions, so carefully weigh the options being presented to you here.
End of the Line
At the start of this quest, head towards the reactor and speak with Father. He will instruct you to eliminate all the allies that helped get you here.
If you say yes, this means you need to wipe out the entire Railroad.
This leads to an incredibly tough battle on your own, but if things get too tough, Power Armor is always the great equalizer, and a Gatling Gun or Fat Man-based attack will completely ruin the Railroad defenders.
However you get the job done, you’ll need to head back to Father after it, and the next quest will begin.
Airship Down

Speak with Father once more and then head to talk to Doctor Li. It’s here you’re going to learn that you are going to take down the Brotherhood of Steel once and for all, including their massive robot weapon, Liberty Prime.
Make sure you’ve got the best armor and weapons available for this mission, as things are going to get very difficult from here.
Head to the relay and get ready to fight. If you find yourself getting destroyed here, try leaving this one till later and take some time to level up a bit and collect better weaponry and armor.
Make your way inside the airship and get some cover; you’re going to need to fight an entire army worth of enemies here, so keep low and use Stimpaks and items like Jet to boost your chances of survival.
You need to make your way towards the generators and destroy both of them. Once destroyed, Coursers and Synths will teleport inside to help you out in the fight.
Take the elevator up to the third level from here and take out the turrets and Protectron up here and you’ll be ready to face the ultimate weapon, Liberty Prime.
You’ll be fighting this massive enemy on the ground, and as soon as you get there, a synth will start hacking Liberty Prime, and you’ll need to defend him while waves of enemies converge on you, including a Vertibird as well.
You have the option of placing beacons around the area to call in additional Synths if you need it, so keep that in mind.
Once the hacking is completed, Liberty Prime will fire on the Brotherhood airship, blasting it out of the sky and ending the threat of the Brotherhood of Steel.
Nuclear Family
![]()
Head back to the Institute one last time and talk with Father. The resulting conversation will end the main storyline of the game. You did it; congrats!
This is only one of many paths you have to choose from when you first get to the Institute, so if you’re curious about what other paths await you, try and find a save back from where you first entered the Institute and change the direction your story takes form there.
Fallout 4 Quests Overview – FAQs
Question: How many different paths can the main story take?
Answer: There are 4 different paths the main questline can take, and each one is completely different with a much different ending depending on what you decide to do.
Question: Can I keep playing after the main story is finished?
Answer: You are free to keep exploring the Commonwealth after the main mission is completed. Depending on what path you decide to take, certain questlines may be cut off for you, so make sure you keep that in mind when making your decision at the branching path.
Question: Does the DLC get affected by the main questline you choose?
Answer: The DLC add ons are open to being played no matter what you choose to do in the main storyline.
Conclusion
Fallout 4 is a massive game that can take hours and hours to finish everything. While this is just one of the main quests you can do, there are tons of side quests, faction quests, and even companion-specific quests to take on that all have their intriguing storylines and awesome rewards get as well. Hopefully, this guide helps you through the main storyline and the branching paths it can take.
Continue reading more Fallout 4 quest guides: