

- Fallout Shelter Best Weapons Guide - March 29, 2023
- Fallout Shelter Legendary Dwellers Guide - March 21, 2023
- Diamond City Guide - January 31, 2023
Intro
Have you ever dreamed of wreaking havoc in the Commonwealth wearing nothing but a bathrobe? Well then, you’re in luck. There’s a mod out there in the wasteland that makes it possible. I’m talking about the ballistic weave mod.
There are four main factions in Fallout 4: The Minutemen, The Institute, The Railroad, and The Brotherhood of Steel. Even if you have no intention of siding with The Railroad in the main quest, helping them out at the beginning is a must. If you don’t, you miss out on the ballistic weave mod, which is arguably the best quest reward in the entire game.
Without the ballistic weave mod, the best damage and energy resistance ratings outside of Power Armor are impossible to achieve. So, let’s get into our Fallout 4 ballistic weave guide.
What is Ballistic Weave?

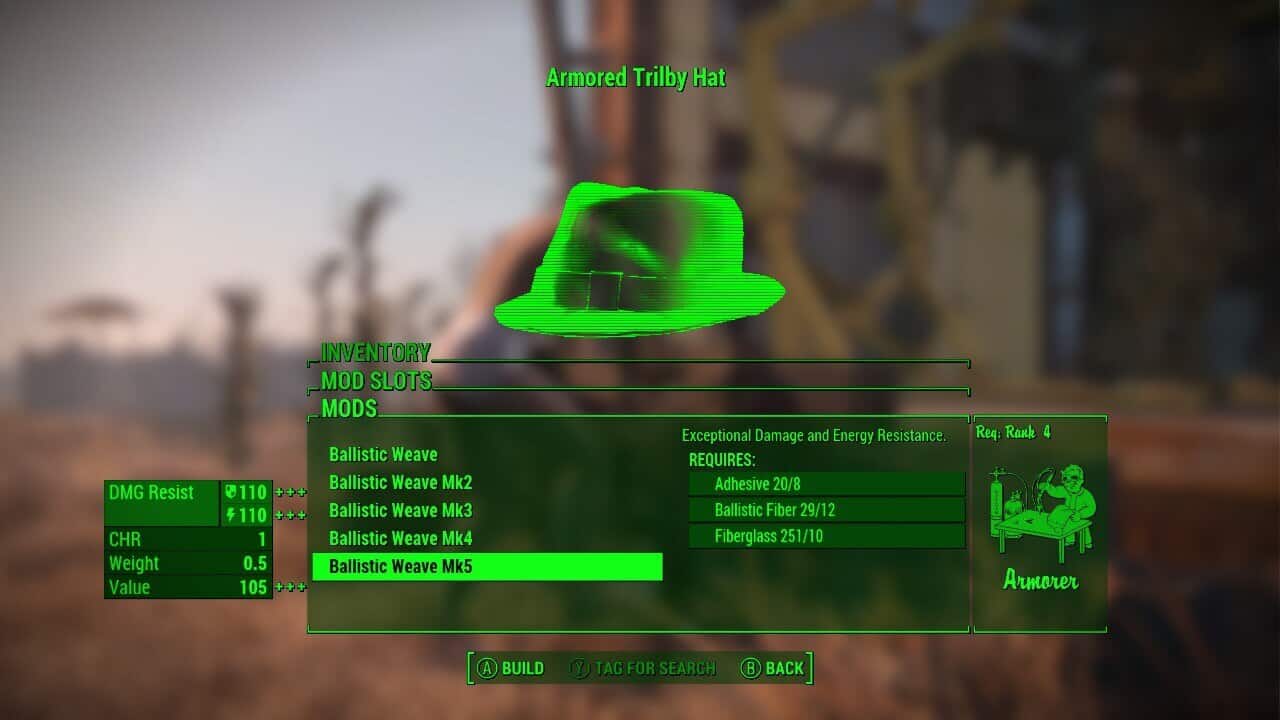
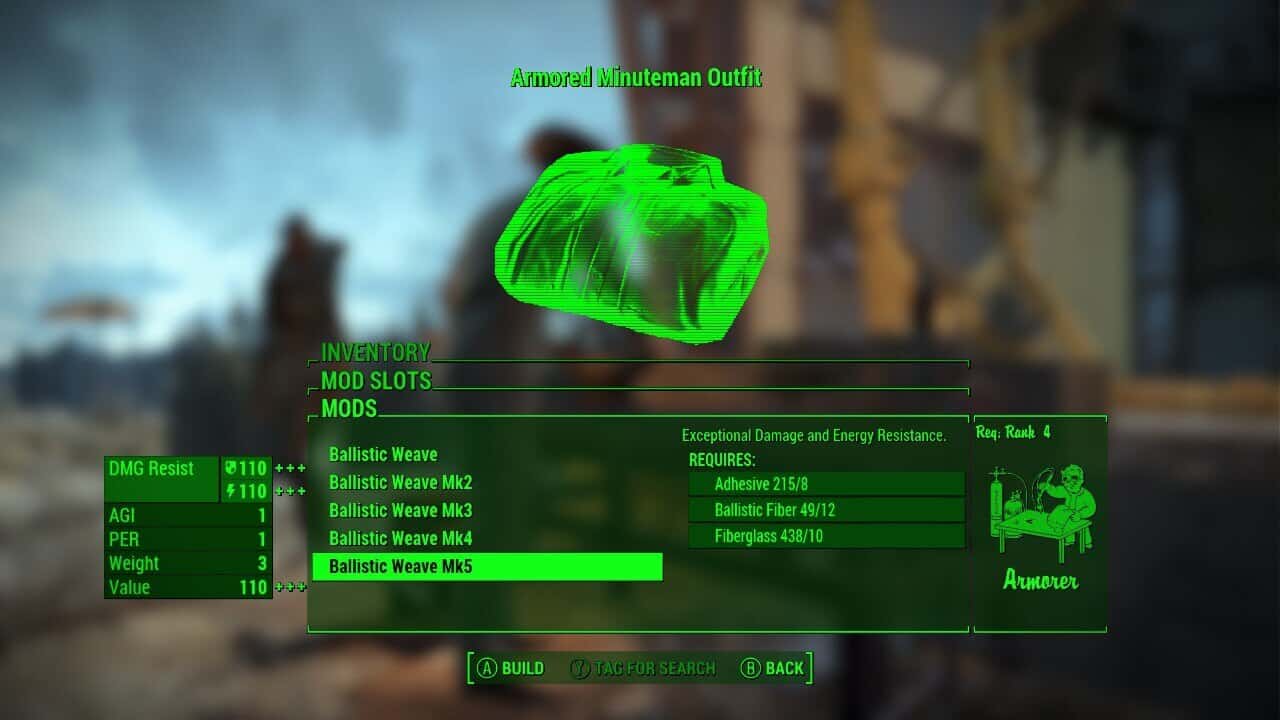
The ballistic weave is an armor mod that you can add to most clothing items and a couple of headpieces. There are five ranks of the ballistic weave mod, and you need to invest in the Armorer perk to apply MkV ballistic weave to your clothing.
What crafting components do I need for the ballistic weave?
Ballistic weave uses adhesive, fiberglass, and ballistic fiber.
At MkV, any application of ballistic weave will use:
- 8 Adhesive
- 10 Fiberglass
- 12 Ballistic Fiber
How do I get the ballistic weave mod?
To obtain the ballistic weave mod, you need to find and help out The Railroad. Don’t worry; helping them out now won’t lock you into siding with them in the main quest.
Road to Freedom
To find The Railroad, start the quest Road to Freedom and follow the Freedom Trail. You can easily activate the Road to Freedom quest by speaking with numerous NPCs in Diamond City or Goodneighbor. You can also start it by listening to the Join the Railroad holotape.
Head to Boston Common near Swan’s Pond. You’ll know you’re in the right place when you see the Tour Bot. Be careful when speaking with the Tour Bot, as it sometimes causes Swan to aggro.
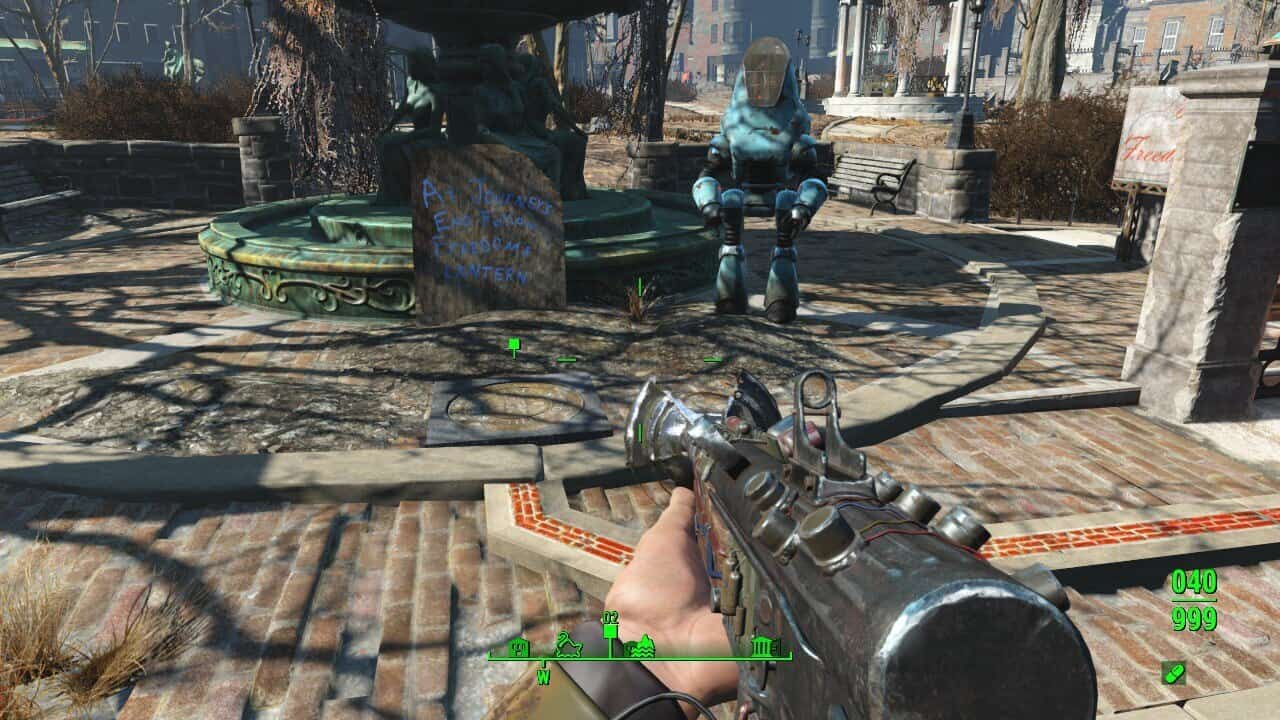
Click on the first Freedom Trail Marker, learn the first part of the code, and begin following the red brick road. Sometimes the trail road is cut off with red paint filling the gaps. Other times debris will cover up the brick road. Just pay attention to where the trail leads, and you’ll be fine.
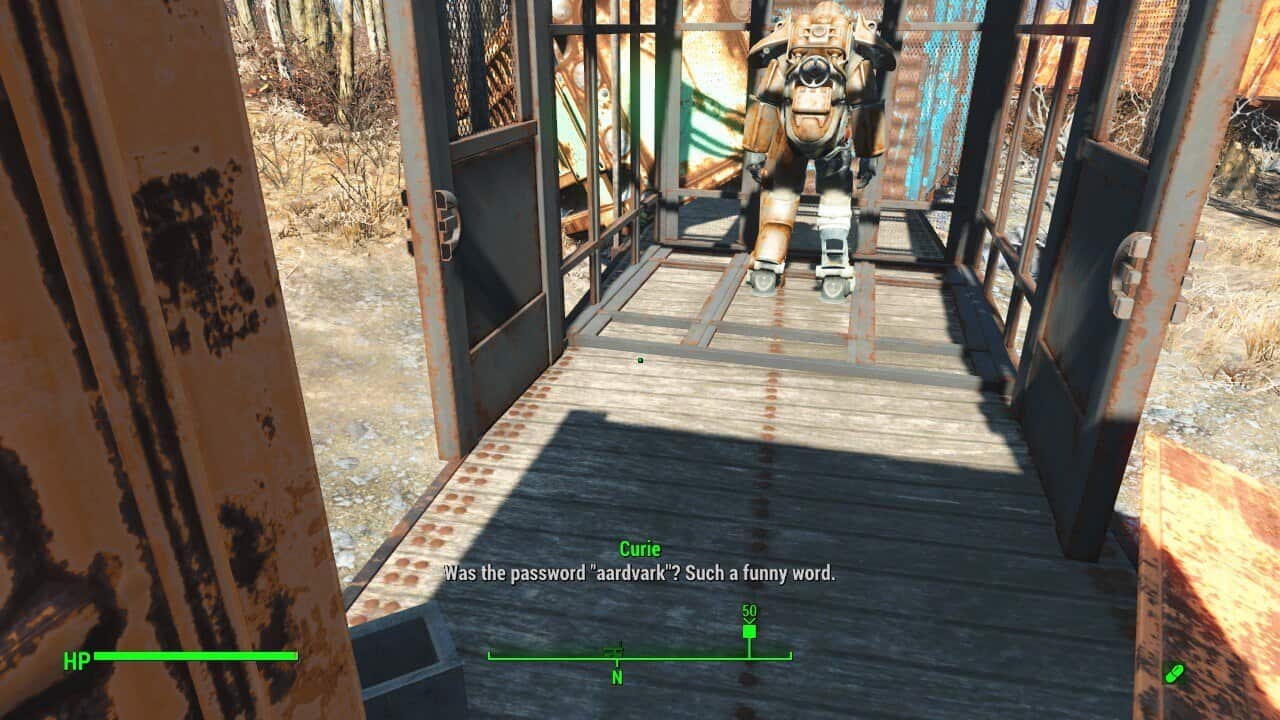
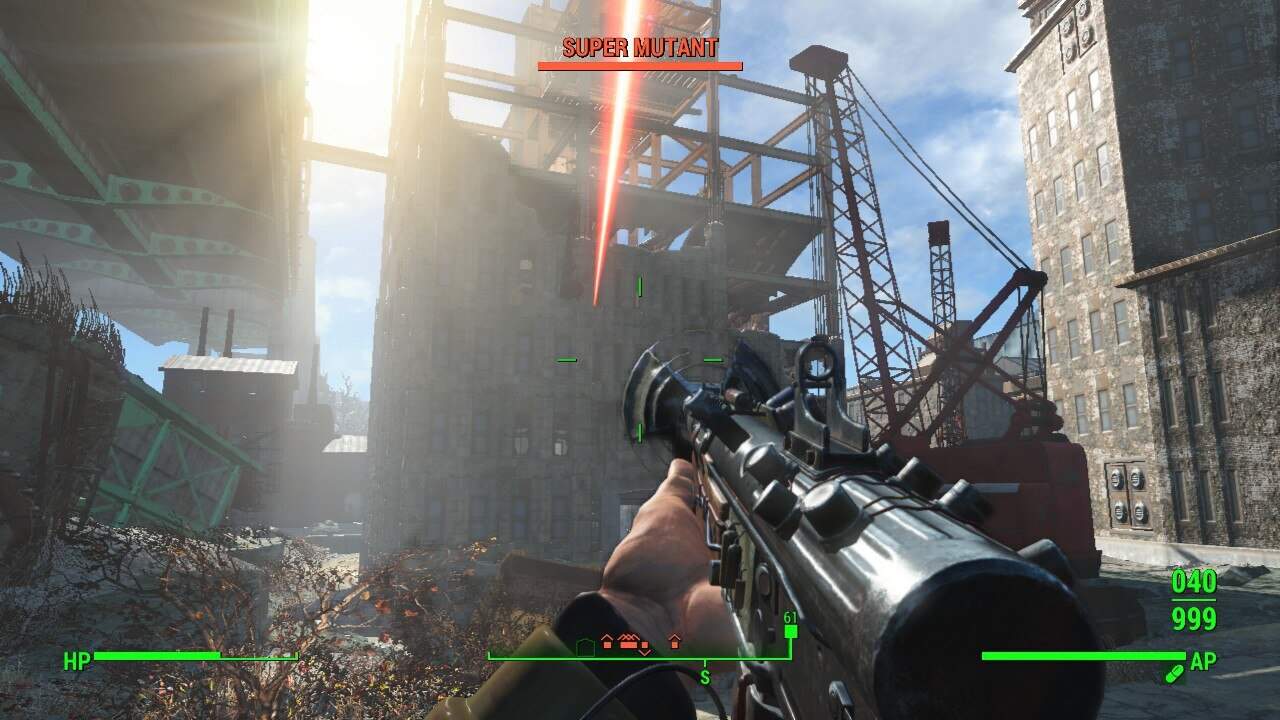
Halfway through the Freedom Trail, the quest gets dangerous. One of the markers is near Faneuil Hall, a Super Mutant encampment. One of the Super Mutants here is a Suicider, so be careful. Keep following the trail, and eventually, it’ll end at the Old North Church. Head inside, take care of some ghouls, and take a right to go into the catacombs.
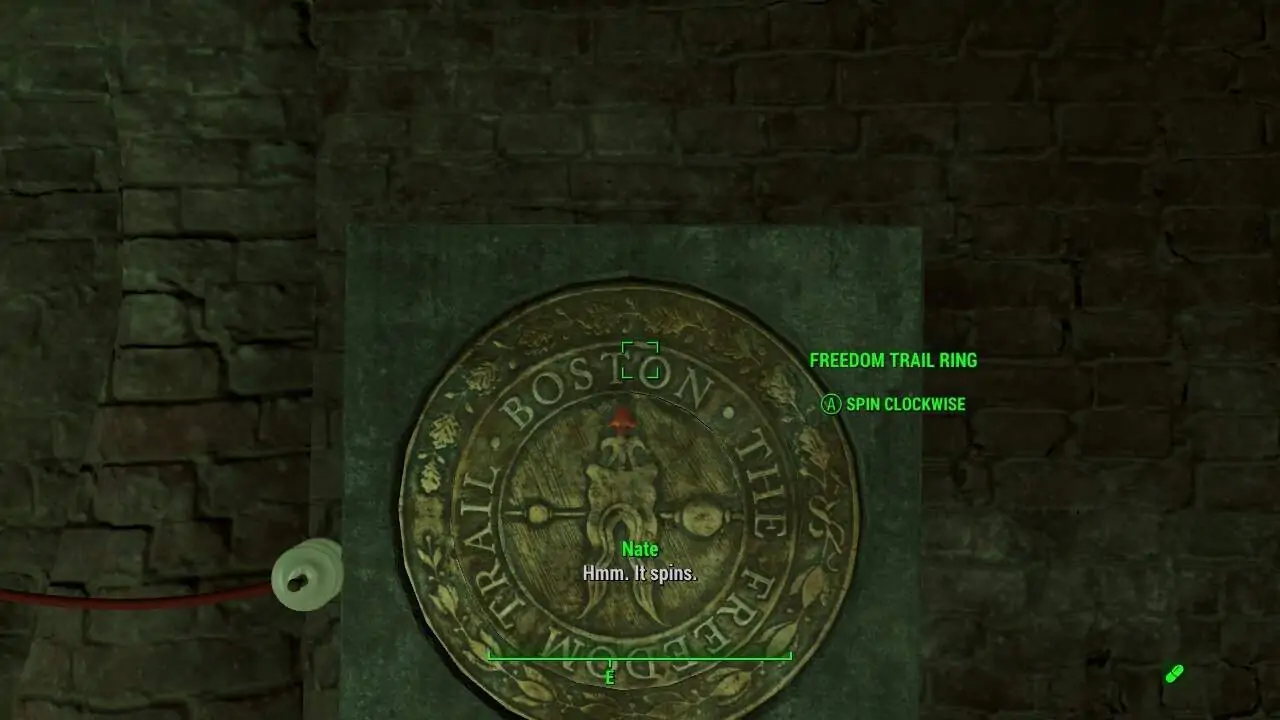
When you reach the end, interact with the wall-based decoder ring and spell the word Railroad. Doing so will reveal a secret door. Head inside, and you’ll meet Desdemona, Glory, and Drummer Boy of The Railroad.
Pass Desdemona’s interrogation/interview, and she will tell you to speak with Deacon about how you can assist The Railroad. And that’s it! Step one is complete.
Tradecraft
Speak with Deacon, and he will tell you the details of an Op he wants the two of you to do. You’re going to The Railroad’s old headquarters at The Switchboard to recover prototype technology for Doctor Carrington. Deacon tells you to meet him at the freeway outside Lexington, so head out.
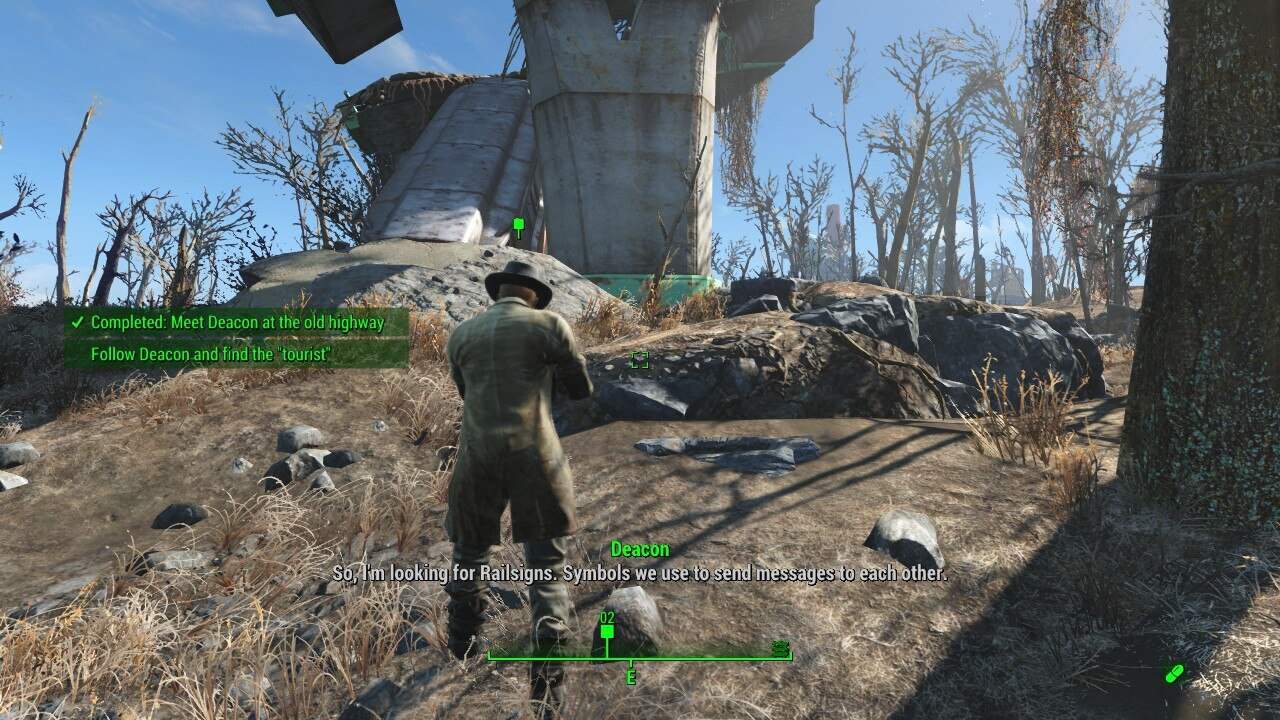
Fast travel to Walden Pond as the meetup spot is a short run from there. You will know you’re in the right place if you see a herd of Radstag on the road to your right. Deacon will be to the left in one of his disguises. Speak with him, and he will tell you that you’re going to meet up with a tourist doing recon on The Switchboard nearby. Follow Deacon up the highway and speak with the tourist.
Talk to Deacon again, and he will recommend the two of you sneak into The Switchboard via the secret escape tunnel. You can do a frontal assault, but the front is heavily fortified.
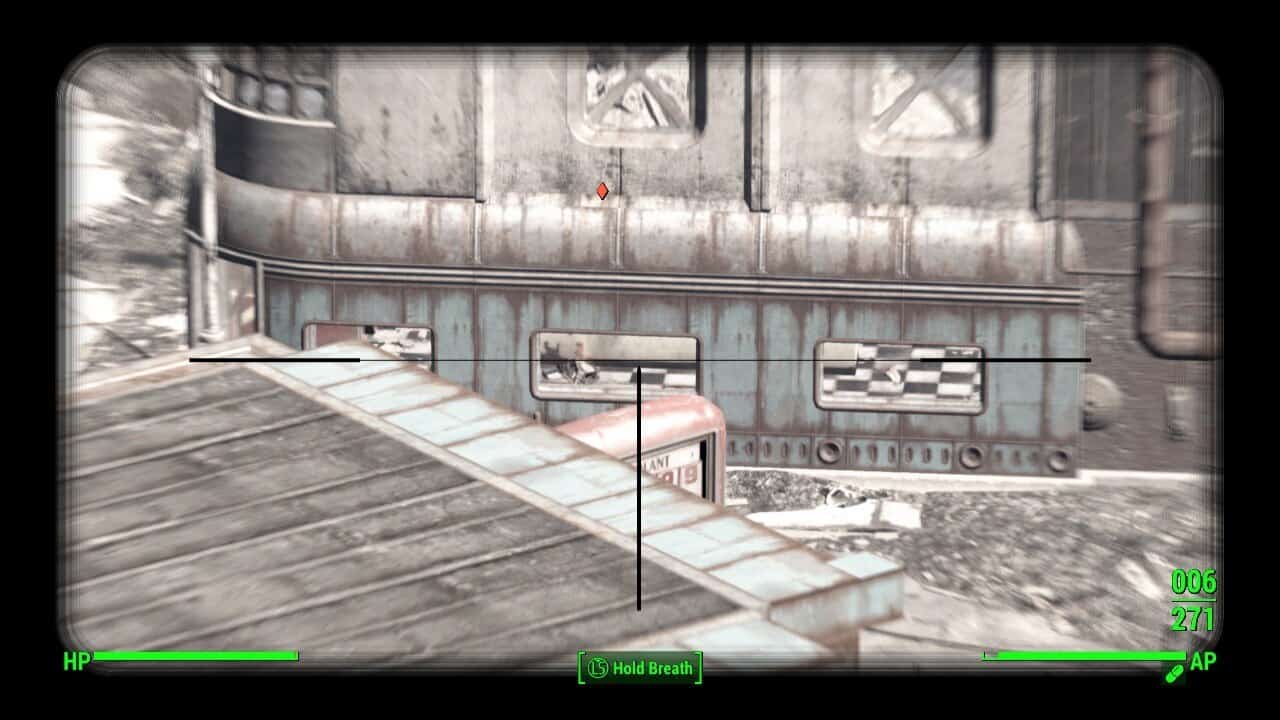
I recommend taking some potshots from your position on the highway. There are a couple of Synths patrolling the surface level of the Slocum Joe’s. There’s a machinegun turret inside, and taking that out will take out two or all three of the Synths. Head for the escape tunnel, which is in a nearby sewage pipe. On the way, there’s a set of T-45 Power Armor next to some storage containers. Hack the terminal to unlock the mag-lock doors to gain access to it if you want.
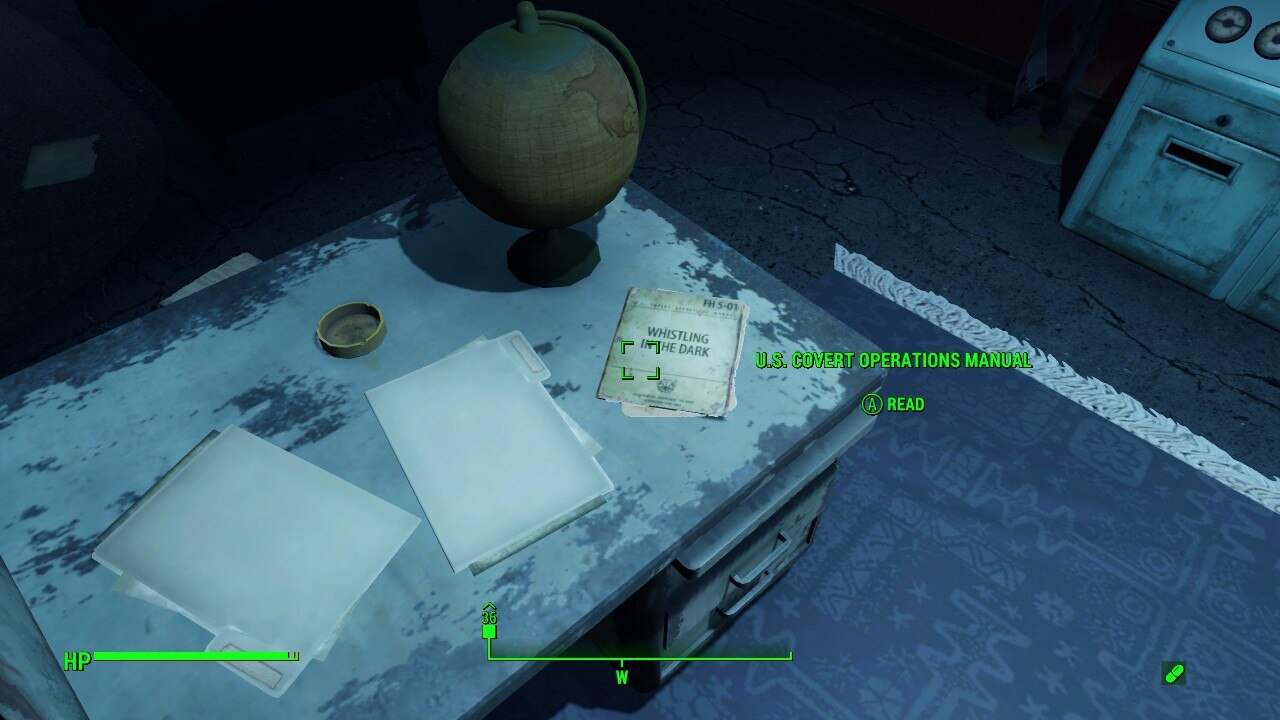
Once you reach the sewage pipe, head inside. The mission from this point on is a basic sweep and retrieve. You’ll have some Synths to deal with, but it isn’t too hard. Push your way through the old base, not forgetting the copy of the U.S. Covert Operations Manual along the way.
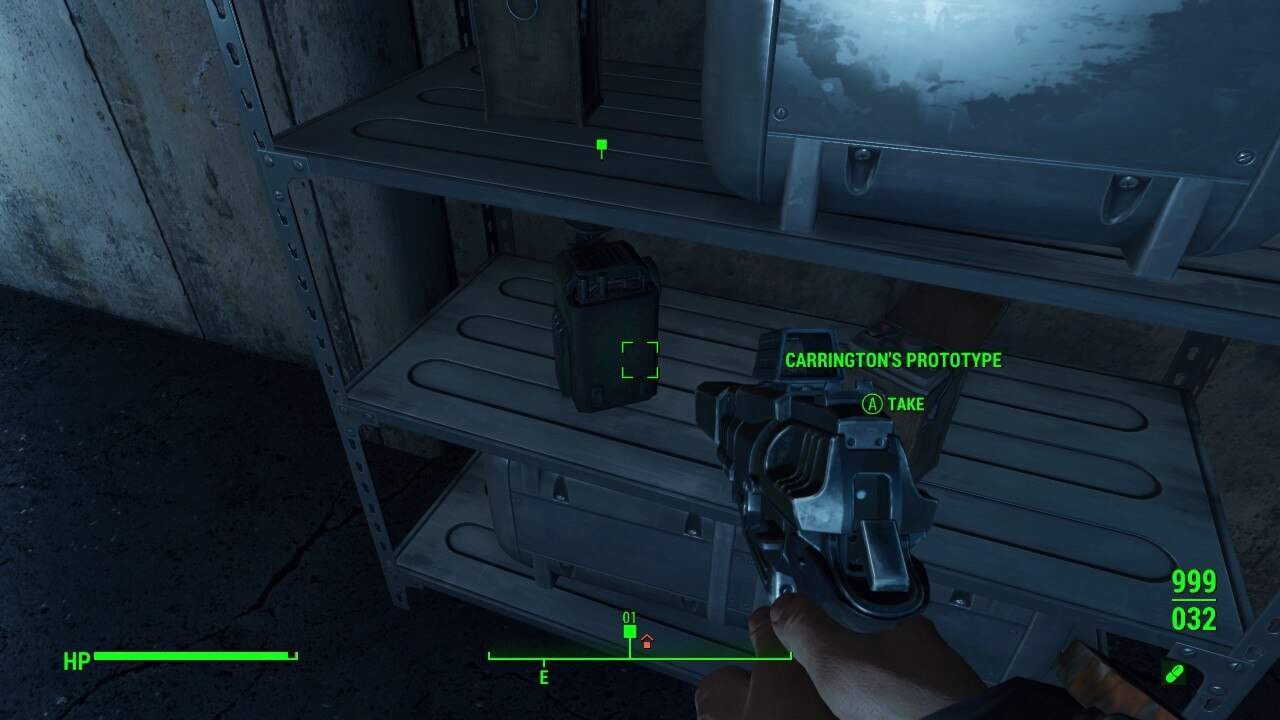
Eventually, you reach the deepest part of The Switchboard and a security vault. Deacon will use the terminal to open the vault, and inside is Carrington’s prototype and a Stealth Boy. Deacon will reward you with The Deliverer, one of the best weapons in the game, and tell you to take the prototype back to Desdemona. She’ll have to make you a member of The Railroad after this.
Head out of the vault room and take a left to head for the exit. Be careful, as there are several cryo mines along the path. Fight your way through some more Synths, then activate the elevator to head back to the surface. Activate the bookcase, and you’ll find yourself inside the Slocum Joe’s. If you took care of the Synths and machinegun turret back on the highway, then the coast will be clear. Deacon will tell you to split up and meet back at the Old North Church.
Do what he says, and you’ll find Deacon speaking with Desdemona about the mission. She will be impressed by your capabilities and officially make you a member of The Railroad. Follow her to see the full Railroad HQ and meet the rest of the team. Step two is complete!
Boston After Dark
After Desdemona introduces you to the rest of The Railroad, she will tell you to give the prototype to Doctor Carrington. I first recommend speaking to Tinker Tom and getting the introductory conversation out of the way. If you don’t do this now, he might bug out later.
After giving him the prototype, Carrington will ask you to go out into the field to help an operative of theirs, Old Man Stockton. Stockton lives in Bunker Hill, but first, you need to retrieve his dead drop. It’s in a mailbox next to a destroyed car slightly northeast of Bunker Hill. From the entrance of Bunker Hill, head north until you reach the bridge. Head east, and you’ll see a mirelurk or two. Kill them and retrieve the dead drop from the nearby mailbox.
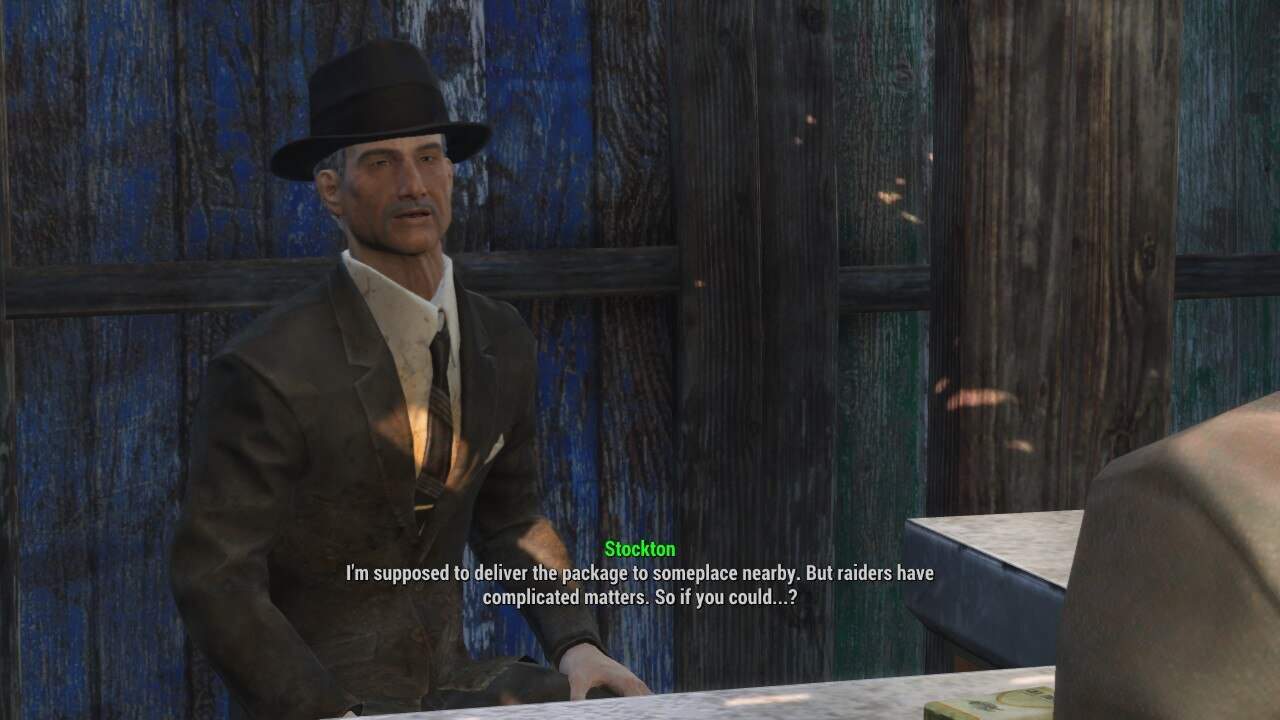
Head back to Bunker Hill and speak with Old Man Carrington. He will discreetly inform you that he has a Synth that needs to escape the Commonwealth. Some nearby raiders are getting in the way, and he needs you to take care of them. Not a problem.
Fast travel to the BADTFL Office or take the short walk there if you haven’t been there already. BADTFL is a raider hideout, and two raiders spawn outside. Up the street from BADTFL is a random encounter spawn point, which may also be more enemies. Take care of every red dot here. Trust me.
Pass the BADTFL Office and on your left is an unmarked construction site that is home to some Super Mutants. They aren’t the objective, but I highly recommend you take care of them now. One of them is a Suicider, so keep your eyes peeled and ears open.
After dealing with them, head back to the road and head right. The raiders you need to take care of are in the nearby church. Kill them and then wait until nighttime if it isn’t evening already. Old Man Stockton will show up with H2-22, the runaway Synth. Stockton will light up a signal to let a nearby Railroad asset come to handle H2-22’s escape. After this, he will tell you to stay with H2-22 until the agent arrives before heading back to Bunker Hill.
Completely ignore what Stockton says, and escort him the short way back to Bunker Hill. Old Man Stockton often ends up dead at BADTFL Office. And that’s even if you cleared the place out on your way to this rendevous point. It’s very frustrating and can be a pain in the rear for a different quest later. It’ll only take a couple of minutes to get him home, and it’s worth doing.
Once Stockton is safe and sound back at Bunker Hill, head back to the church. Soon, an agent by the name of High Rise will show up. He’s here to take H2-22 to his place before he smuggles him out of the Commonwealth. He needs help taking care of some raiders getting in the way. Agree to help him and follow his lead.
You will have to dispatch three groups of raiders on the way to Ticonderoga. There’s a raider outpost along the way, and it’s very close to the Super Mutants at the construction site. If you didn’t take care of them before, there’s a strong chance they will aggro here.
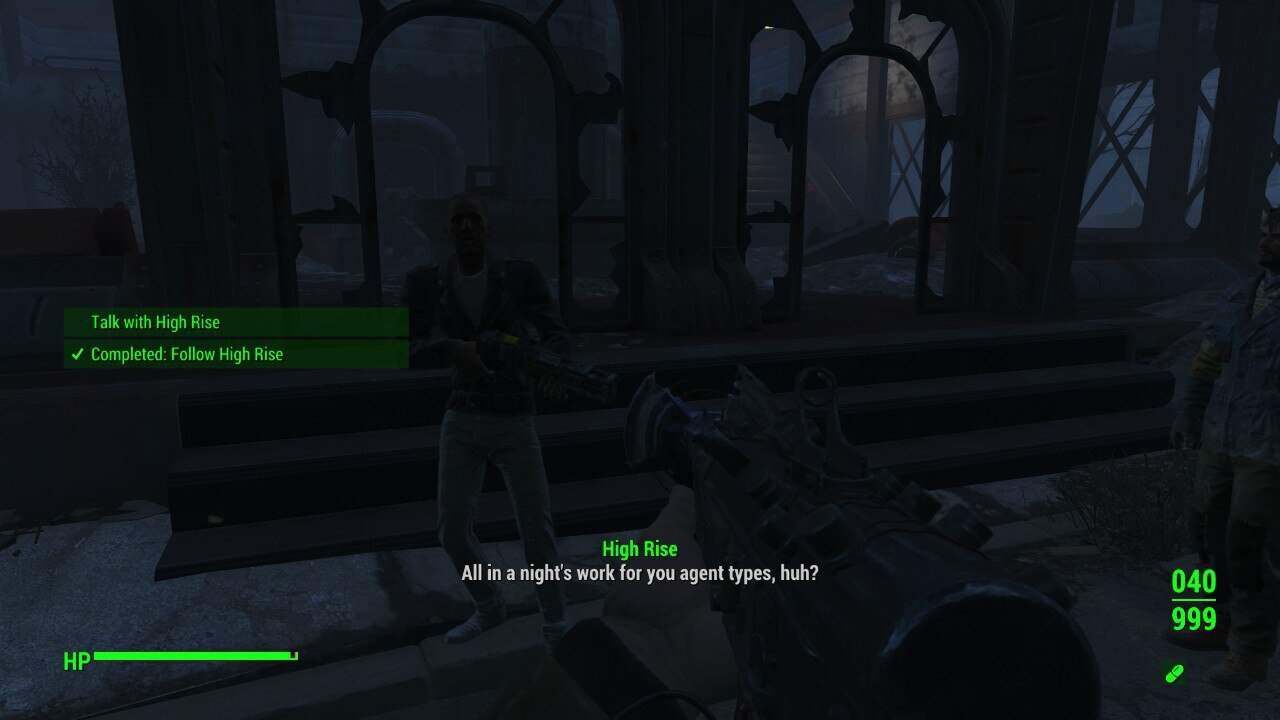
Keep following High Rise, and soon you will reach Ticonderoga. Say goodbye to him and H2-22, and report your success to Doctor Carrington. Three quests down, two more to go.
Mercer Safehouse
Once you reach this point, The Railroad tries to confuse you and bombards you with quests. I did all the quests I didn’t need to do before I finally completed the quest that unlocks the ballistic weave mod. Do as I say, not as I do.
When you head back to Railroad HQ to turn in Boston After Dark, Drummer Boy will run up to you to say Tom wants you for something. Speaking with Tom will start his Weathervane quest. Do not start this quest yet. Despite Tom being the one who provides you with the ballistic weave mod, you don’t have to do his MILA missions to get it.
After you hand in Boston After Dark to Doctor Carrington, he will tell you that the Institute has attacked and destroyed two of their safehouses. He will ask you to confirm the status of a third safehouse, Augusta safehouse, which automatically starts the quest Butcher’s Bill. As with Weathervane, ignore this, as it won’t get you any closer to the ballistic weave mod.
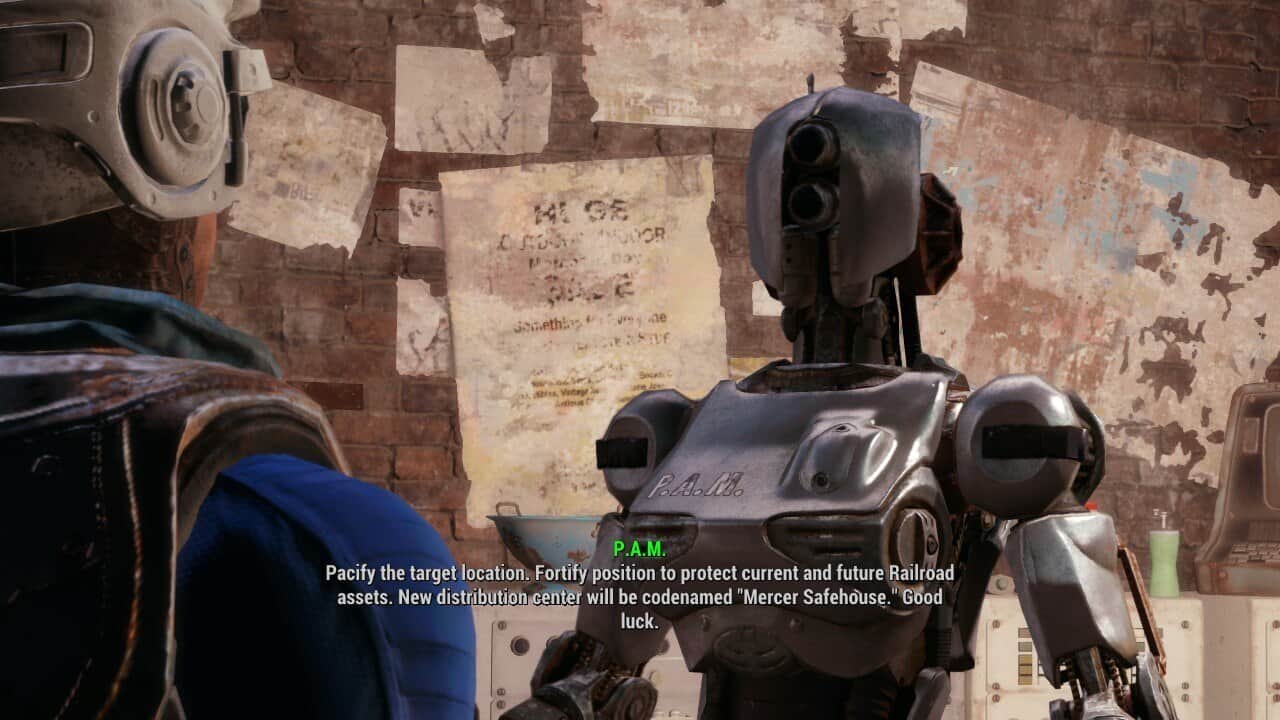
Instead, talk to PAM. She will ask you to secure a new safe house for Railroad agents, which begins the Mercer Safehouse quest. She will send you to 1 of 12 random settlements you haven’t unlocked yet. Some of these are easy, but others have Mirelurk Queens and Children of Atom to clear out. Make sure to bring enough components to create two machinegun turrets, as the settlement needs at least 10 Defense before the quest is complete. Once done, head back to Railroad HQ.
Drummer Boy will approach you again, this time informing you that Desdemona wants to see you. Speaking with her will initiate the Randolph Safehouse questline. Once again, ignore it for now.
Talk to PAM about the success of Mercer Safehouse, and the quest will be complete. You’re in the home stretch now.
Jackpot

After handing in the Mercer Safehouse quest, PAM will tell you about hidden DIA caches around the Commonwealth that she wants for The Railroad’s agents. She will give you an RFID device that will grant you access to these caches.
There are three caches in total, and their locations are always the same, but the order PAM sends you in is randomized. The three possible cache sites are:
- Hub 360
- Pinnacle Highrise
- Medford Memorial Hospital
Medford Memorial Hospital is a Super Mutant hideout with one Suicider outside and another on the bottom floor behind the lobby desk. Pinnacle Highrise is the site of a firefight between Super Mutants and Gunners. Hub 360 is another Super Mutant hideout, but you can avoid most of them.
Whichever location you receive, the door to the hidden cache will immediately open when you get close to it. You don’t have to take anything (Though feel free to grab some loot), so once the cache is unlocked, head back to Railroad HQ.
Speak to PAM to turn in the first Jackpot quest, and congratulations! We can finally get to the good stuff.
Getting the Ballistic Weave mod
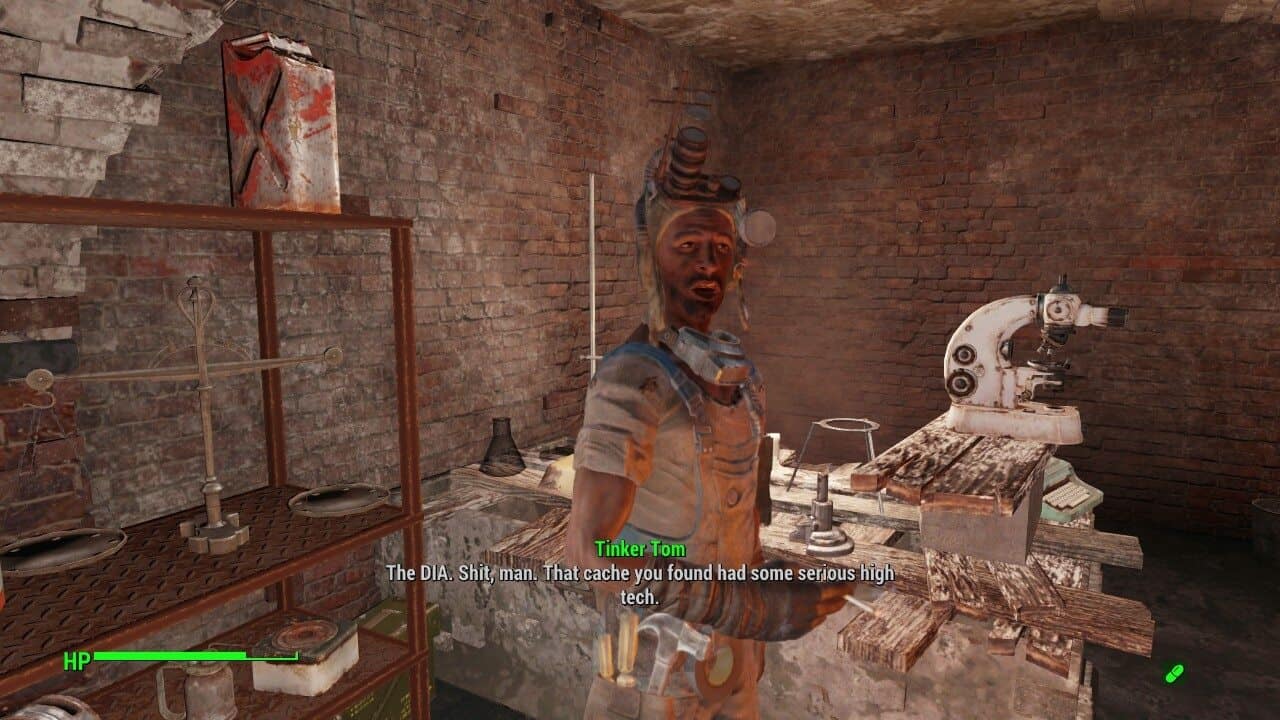
After turning in the first Jackpot quest, go and speak to Tinker Tom. He will tell you that the DIA cache you found had some seriously high tech, the best of all being ballistic polymer weave. Barter with Tom, and you’ll see that he now sells Armored clothing sets.
Oddly enough, the game doesn’t even tell you that you have access to the ballistic weave mod. But once you reach this point, you can take a break from questing. It’s time to give your armor a makeover.
The Ballistic Weave mod
The ballistic weave is an armor mod with five tiers of protection that you can apply to numerous clothing sets and headwear. Any Sole Survivor can use the first tier, but the next four require investment in the Armorer perk.
- Ballistic Weave: No requirements
- Ballistic Weave MkII: Armorer Rank 1
- Ballistic Weave MkIII: Armorer Rank 2
- Ballistic Weave MkIV: Armorer Rank 3
- Ballistic Weave MkV: Armorer Rank 4
- Each level of ballistic weave provides increasing damage and energy resistance.
- Ballistic Weave: 30 Damage and Energy Resistance
- MkII: 45 Damage and Energy Resistance
- MkIII: 65 Damage and Energy Resistance
- MkIV: 90 Damage and Energy Resistance
- MkV: 110 Damage and Energy Resistance
What clothing and headwear can I apply ballistic weave to?
Headwear
You can apply ballistic weave to only four pieces of headwear. Those are:
- Green rag hat
- Battered Fedora
- Trilby hat
- Newsboy cap
Clothing sets
You can apply ballistic weave to 73 clothing sets. Huge disparity, I know.
Those sets are:
- Agatha’s dress
- Army fatigues
- Atom Cats jacket and jeans
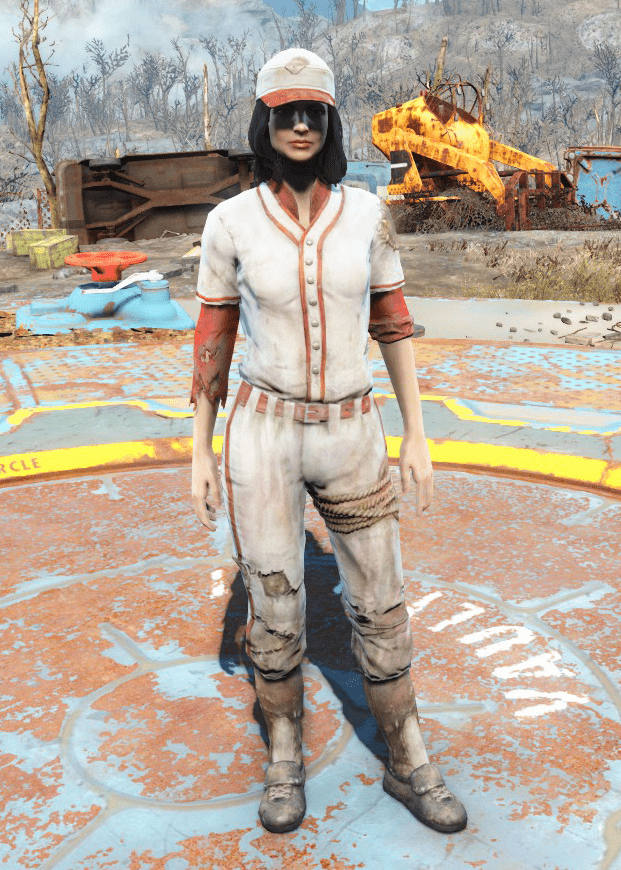
- Baseball uniform
- Bathrobe
- Black vest and slacks
- Cabot’s lab coat
- Casual outfit
- Checkered shirt and slacks
- Child of Atom rags
- Clean blue suit
- Clean tan suit
- Clean grey suit
- Clean striped suit
- Courser uniform
- Dirty army fatigues
- Dirty black suit
- Dirty blue suit
- Dirty tan suit
- Dirty grey suit
- Dirty striped suit
- Dirty postman uniform
- Dirty trenchcoat
- Faded trenchcoat
- Farmhand clothes
- Father’s lab coat
- Fatigues
- Feathered dress
- Geneva’s ensemble
- Greaser jacket and jeans
- Green shirt and combat boots
- Hooded rags
- Hunter’s long coat
- Lab coat
- Laundered blue dress
- Laundered cream dress
- Laundered red dress
- Laundered green dress
- Laundered denim dress
- Laundered pink dress
- Laundered rose dress
- Laundered loungewear
- Legend of the Harbor
- Longshoreman outfit
- Lorenzo’s suit
- MacCready’s duster
- Magician’s tuxedo
- Maxon’s battle coat
- Mechanic jumpsuit
- Mechanist’s armor
- Military fatigues
- Minutemen outfit
- Nuka-World jumpsuit
- Padded blue jacket
- Pastor’s vestments
- Patched three-piece suit
- Postman uniform
- Ratty skirt
- Red dress
- Red frock dress
- Reginald’s suit
- Red leather trench coat
- Robes of Atom’s Devoted
- Sequin dress
- Submariner uniform
- Summer shorts
- Surveyor outfit
- Suspenders and slacks
- Sweater vest and slacks
- T-shirt and slacks
- Tattered rags
- Tuxedo
- Utility coveralls
- Yellow trench coat
Best Headwear for Combat
The trilby hat and newsboy cap both offer bonuses to Charisma, so they’re out. That leaves the green rag hat and the battered fedora. The green rag hat gives +10 energy resistance, and the battered fedora gives +1 Luck.
Critical hits are incredible in Fallout 4, so I favor the battered fedora. You’ll be getting plenty of energy resistance once you finalize your armor set, so I value the additional energy resistance less.
Best Clothing for Combat
To determine the best clothing for combat, we first need to identify the clothing sets that you can wear beneath five armor pieces. There are seven sets in total where this is possible:
- Army fatigues (+1 STR +1 AGL)
- Baseball uniform (+1 STR +1 AGL)
- Dirty army fatigues (+1 STR + 1 AGL)
- Green shirt and combat boots (+1 CHR + 1 END)
- Military fatigues (+2 AGL)
- Minutemen outfit (+1 AGL +1 PER)
- Tattered rags (-1 LCK)
The tattered rags are out. The decision then depends on your playstyle. The strength and agility outfits are balanced sets for any character build. Everyone benefits from the extra carry weight and AP, and melee characters benefit from the extra strength.
If you’re on the more cautious side, the green shirt and combat boots might be your best bet for the extra HP. For snipers/ranged characters, the military fatigues or Minutemen outfit is best.
Charisma Outfit + Combat Loadout All in One
As soon as you step out of Vault 111, getting the pieces of a Charisma outfit is a priority. By that, I mean +1 headwear, +1 eyewear, and a +2 clothing set. That gives you a Charisma Outfit of +4.
By doing a particular quest featuring a Super Mutant looking for the milk of human kindness, you can get a piece of clothing with +3 Charisma. That brings your Charisma outfit bonus to +5.
Charisma outfits don’t weigh that much, but it’s still less room for loot. With the ballistic weave mod, you can get yourself the best Charisma outfit in the game and be ready for combat at the same time. How, you might ask?
Sharp Armor

Sharp armor pieces are legendary or unique armor pieces with the Sharp effect that gives +1 to your Charisma and Intelligence. With 4 Sharp armor pieces, that’s an additional +4 Charisma.
There are two clothing sets in the game, that when worn with Sharp armor pieces, give +8 Charisma.
Green shirt and combat boots
You can wear the green shirt and combat boots along with 4 Sharp armor pieces for the best mixture of Charisma bonus and combat protection. It’s an easy-to-find clothing set. If you’re having trouble getting your hands on one, pay Fallon a visit in Diamond City.
Summer shorts
The summer shorts are harder to find than the green shirt and combat boots. But if you have them, you can achieve +8 Charisma wearing them.
You cannot wear summer shorts with a chest armor piece, but since they give +2 Charisma over the green shirt and combat boots’ +1 Charisma, it doesn’t diminish their Charisma suit value.
Being unable to wear a chest piece will drop your protection level significantly. The summer shorts are more stylish, though.
The trickiest part in getting this to work is finding 4 Sharp armor pieces. If you have any Level 4 traders at your settlements, that should help. Level 4 traders can randomly have legendary equipment in stock.
FAQs
Question: Why can’t I apply the ballistic weave mod to a clean black suit?
Answer: Because Bethesda is wonky. You use the ballistic weave mod on a dirty suit but not a clean one. I’ll have to Todd about that one.
Question: Should I keep upgrading my armored clothes and hats each time I reach a new mark?
Answer: Honestly, I would say no. All the components you need to apply the mod are pretty premium. In the early game, the mod is overkill, honestly. You’ll be fighting raiders with pool cues and mole rats.
Question: Is the Institute Killer weave mod worth using?
Answer: Not even close. You get it by further assisting The Railroad, but it kind of sucks. Would you take a 10% damage bonus to only Institute members and Synths over a constant +110 damage and energy resistance bonus?
Conclusion
There you have it, folks. That’s how you get the best quest reward in Fallout 4. If Power Armor isn’t your thing, the ballistic weave mod is what you need to make yourself a tanky boy. Or girl.
It also really lets you have a lot of fun in previously worthless combat clothing. I like to wear a tuxedo, use the Deliverer, and pretend I’m Agent 47. Now, if you’ll excuse me, I’ve been hired to kill a Deathclaw.
See you in the Commonwealth!