

- Fallout Shelter Best Weapons Guide - March 29, 2023
- Fallout Shelter Legendary Dwellers Guide - March 21, 2023
- Diamond City Guide - January 31, 2023
Intro
The wastelands of the post-apocalyptic world can be dangerous places for anyone. Caravan hands, mercenaries, and yes, even Brotherhood of Steel knights and paladins. The wastes have mercy on no one, and what may seem like a textbook mission could turn out to be the final chapter of your story.
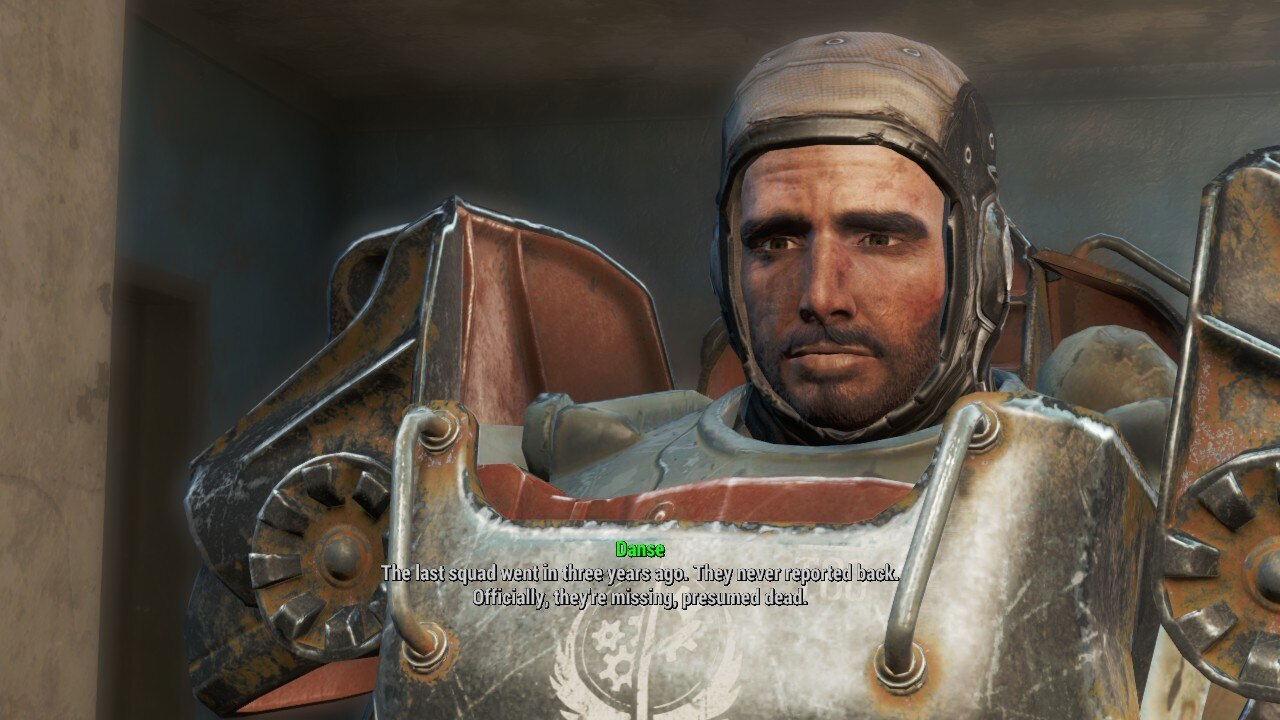
Several years ago, a Brotherhood of Steel team went to the Commonwealth for a recon mission. They haven’t been heard from since. But the Brotherhood of Steel doesn’t forget its’ brothers or sisters. It’s time someone got to the bottom of what happened to The Lost Patrol.
Before We Begin Or The Lost Patrol Fallout 4 Guide
I highly recommend that you are at least level 35 before finishing this quest and are an official member of the Brotherhood of Steel.
To officially join the Brotherhood of Steel, you must first complete Act 1 of the main quest to trigger the Brotherhood’s arrival in the Commonwealth. You can finish this quest before the Brotherhood shows up, but you won’t get the best reward if you do.
Notable Loot
- Survivor’s Special (Potentially)
- Black BOS officer uniform (Potentially)
- Stealth Boy
- Fusion core
- Steadfast BOS combat armor chest piece
Beginning The Lost Patrol
There are three ways to begin The Lost Patrol:
Stumble across one of the distress signals
The easiest and most likely way many players will start the quest is just by exploring the Commonwealth. If you get within proximity of any of the distress signals, The Lost Patrol will automatically begin.
The game will display a distress signal strength indicator to tell you if you’re closer or further from the source. There will also be a noise indicator, with the beeper getting faster and louder the closer you are.
Track down the initial distress signal and press on with the quest. Do not complete it before joining the Brotherhood of Steel, however. There’s something you need to do in the last leg of the quest to get the best reward, and you can’t do it unless you’re a Brotherhood member.
Receive The Lost Patrol from Paladin Danse
You can receive the quest from Paladin Danse at the Cambridge Police Station. But first, you’ll need to add the Brotherhood with different assignments.
First up is Fire Support. Head to Cambridge Police Station and help Danse fend off the feral ghouls. After getting the introductions out of the way, agree to accompany him to ArcJet System for the quest Call to Arms.
Once you finish Call to Arms, Danse will invite you to join the Brotherhood of Steel. Agree, then meet him back at the police station. Danse will order you to assist his fellow squad members Knight Rhys and Scribe Haylen.
Complete one Cleansing the Commonwealth and Quartermastery quest for Rhys and Haylen, respectively. One of them will direct you to Danse. Speak with him, and you’ll begin The Lost Patrol.
If you begin this quest after you unlock Danse as a companion, I recommend bringing him along. He provides commentary on each quest point.
Receive The Lost Patrol from Lancer Captain Kells
You have to officially join the Brotherhood of Steel before Kells can give you The Lost Patrol quest. To do that, you need to trigger the Brotherhood’s arrival in the Commonwealth by completing the main quest, Reunions, at the end of Act 1.
At this part, many players have trouble with a seeming bug that wouldn’t allow them to speak to Kells about the mission. It turns out that you first need to complete the Show No Mercy quest. It’s your first official mission with the Brotherhood of Steel and will require you to wipe out the super mutant stronghold, Fort Strong. After completing this assignment, you’ll be able to talk to Kells about The Lost Patrol.
You need to turn in the mission to Kells to receive the best reward, but you don’t need to start it with him.
Looking for The Lost Patrol
If you receive the mission from Danse, he will tell you that the missing patrol from three years ago dropped down in the hills near Malden. There are three distress signals you need to track down.
Knight Varham
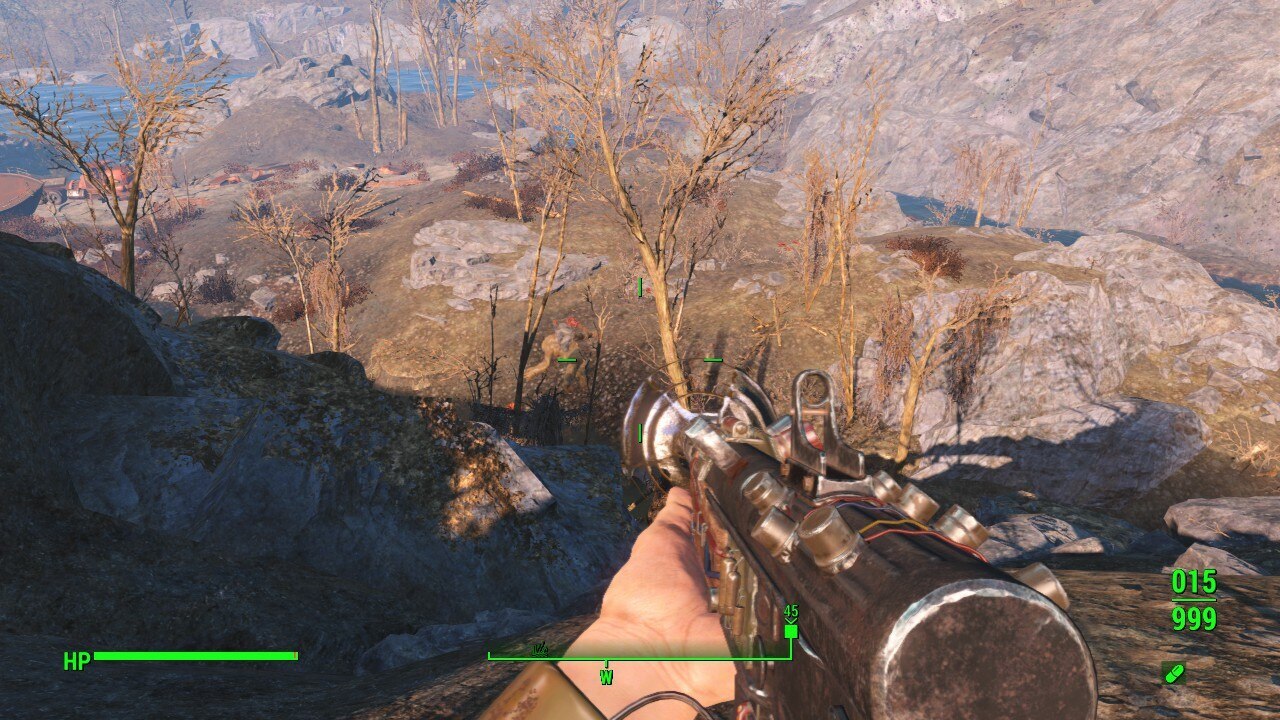
An easy way to track down Knight Varham’s distress signal is to head to Med-Tek Research. Be careful, as a deathclaw is commonly around this area. There may also be feral ghouls and a roaming Super Mutant party.
Head straight east from the fast-travel point of Med-Tek until you see a ruined, blown-out building. Inside will be the deceased Knight Varham. It appears some massive battle occurred here, as there are several destroyed suits of Power Armor scattered on the ground.

Take the Battlefield holotape and holotag off Varham’s surprisingly corpse for someone dead for three years, and listen to the tape. An unknown man will talk about an ambush and how their enemies outnumber them five-to-one. A woman shouts Varham’s name as he seemingly is killed in the assault.
The unknown man orders what’s left of his team to scuttle the Power Armor of the deceased to prevent the enemy from taking it. He tells them to fall back and head for the old military base before trying to reach their holdout. The code for this secret location is their callsign, which you don’t know yet.
Knight Astlin
The old military base the unknown man was referring to is the National Guard Training Yard. There will be a lot of feral ghouls here, as well as a couple of machinegun turrets on the roof. In the back of the training yard is a patrolling Sentry Bot. These are extremely dangerous at lower levels, so come prepared. A pulse grenade or two will go a long way.
Something interesting to note is that there are two sets of Power Armor here. One of them is a complete set, and both can spawn as X-01 Power Armor. Unfortunately, the National Guard Training Yard is a common location to come across in your travels.
You need to be at least level 45 before X-01 Power Armor spawns, and most players will pass by here well before then. Leveled Power Armor is determined as soon as you enter the zone. Regardless, they’re yours to claim whatever variety they may be. Decide to collect your spoils now or later and get back to the mission.
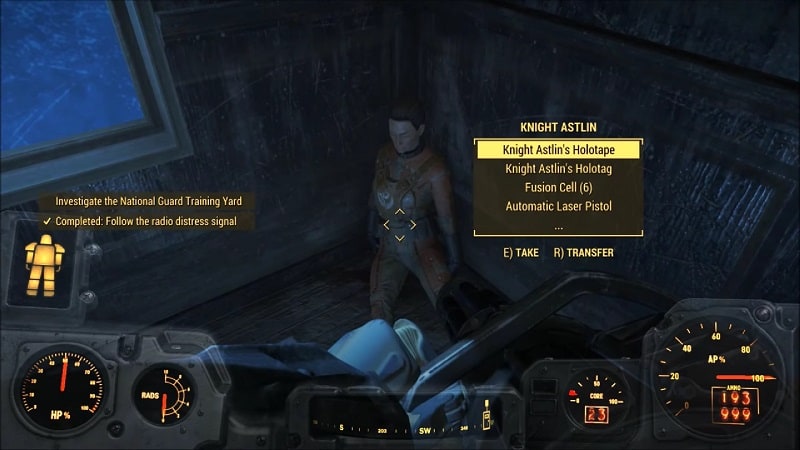
Head inside the recruitment office and into the main room of the building. A couple of feral ghouls will be lying around, but nothing too dangerous. There’s an office on the right side of this room. Head inside, and you’ll find the corpse of Knight Astlin. Pick up her holotag and holotape, and give the tape a listen.
Astlin and her team made it to the National Guard Training Yard. Someone named Paladin Brandis and someone named Faris left to secure a nearby satellite array. Astlin was left behind to secure and maintain this position, but feral ghouls overran the are.
Astlin locked herself in the office but became aware that the door wouldn’t last much longer. It’s clear that the ghouls eventually made their way in and killed her. An unfortunate loss, but there’s nothing we can do but press on and try to find the remaining team members.
Scribe Faris
The nearby satellite array that Astlin was referring to is the Revere satellite array. Unfortunately for Faris, the super mutants were coming, not the British. Head up the stairs of the southeast array tower to find the corpse of Scribe Faris in a makeshift structure. Pick up his holotag and holotape to get details on what happened.
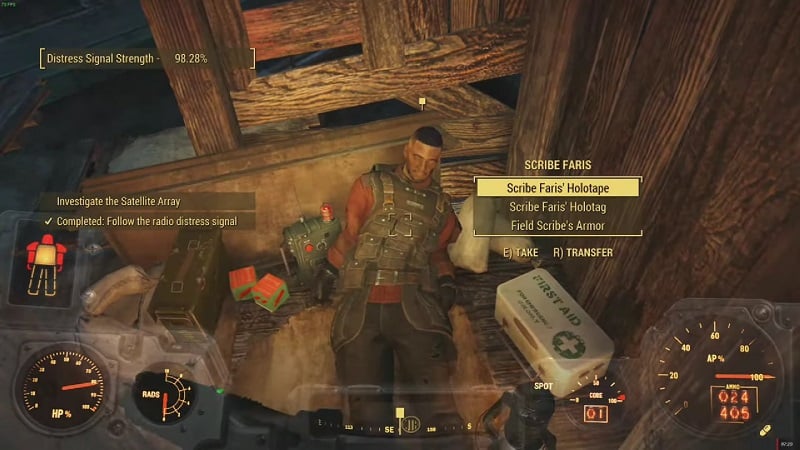
It appears that Brandis and Faris traveled to the satellite array to attempt to contact the Prydwen. They were unable to do so, and something along the way, Faris caught a bullet in the leg.
Soon, they picked up Astlin’s distress signal, and Brandis went back alone to try to save her. Faris reveals that he couldn’t staunch the bleeding and suspects the bullet hit one of his arteries. Presumably, he bled out and died soon after recording his tape.
After collecting all three holotapes in any order, you will receive the Recon Bunker Access Code 429A. You cannot get inside the bunker without it, even if you know where it is. It’s time to go and see if at least Paladin Brandis survived.
Paladin Brandis
You will find Recon Bunker Theta at the northernmost end of the map. It’s a straight shot east of Outpost Zimonja and northeast of Tenpines Bluff. Be very careful in this area. You may run into super mutant behemoths and even a mirelurk queen.
There are frag mines on the frontal path to the bunker as well. If you like a challenge and some good experience, it’s not a half-bad idea to clear out the surrounding area before going to the bunker.
Enter the code on the terminal to open up the door to the bunker. Once inside, the still alive Paladin Brandis will aim his weapon at you and threaten to kill you if you take another step. He demands to know who you are and how you got in here.
Watch what you say to Paladin Brandis. It’s been three years that he’s been alone out here, and he’s not in the best mental state. If you ask him if he’s Brandis several times, he will attack you. If you try to get any closer, he will attack you.
Either pass one of the several speech checks to calm the situation down or tell him you followed the distress signals to find him after asking if he’s Brandis. If you tell him you were exploring or for him to drop the gun (In the second dialogue tree where this option isn’t a speech check), he’ll attack you.
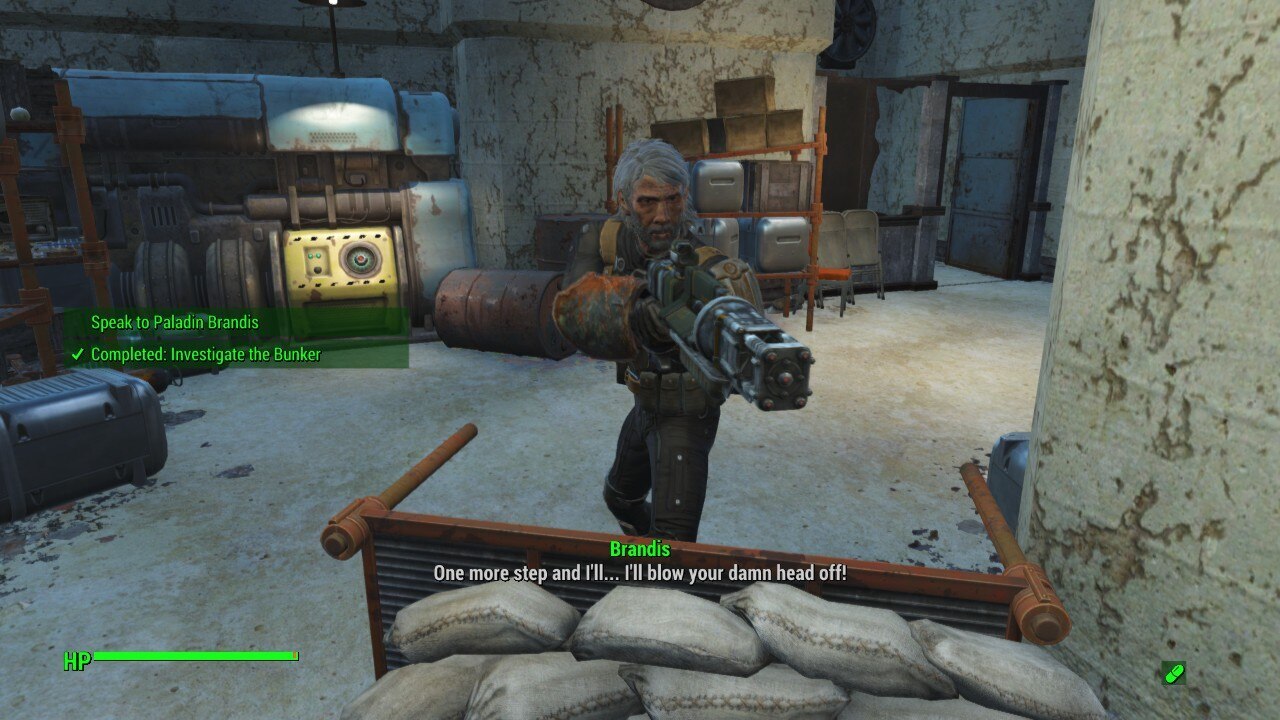
Brandis will ask you what happened to his team. If you lie, he will attack you. Tell him the truth, and Brandis will finally put his laser pistol down. He’ll thank you for telling him what happened to his team after being left in the dark after three years and giving him their tags.
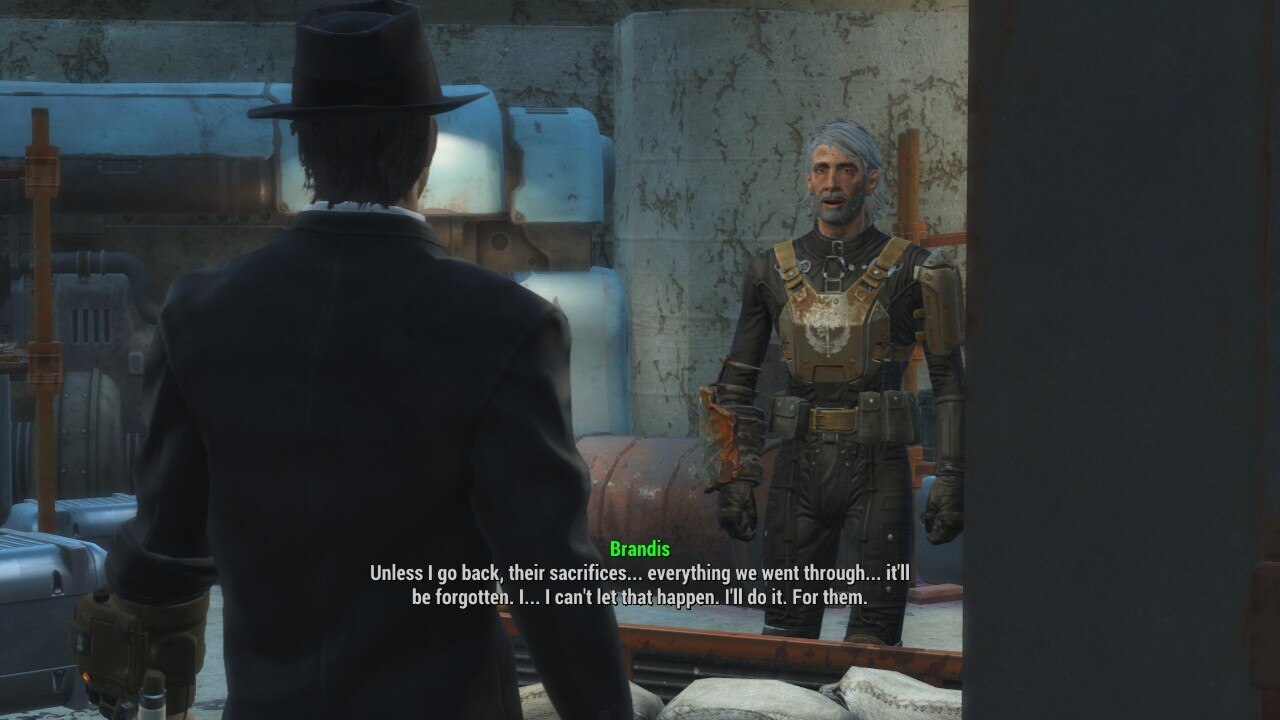
Brandis will tell you that you deserve a reward for your efforts and allow you to take anything inside his bunker. If you want the best quest reward, pass three speech checks to convince Brandis to rejoin the Brotherhood.
If successful, he will agree for the sake of his fallen teammates. After you leave the area and return, Brandis will be gone. You can find him on board the Prydwen with a shave, a new haircut, and a steadier voice. If you speak with him, he’ll thank you again for what you did for him and his team.
Alternative Ending: Kill Paladin Brandis
Whether you accidentally make Brandis hostile or intentionally kill him, you can still complete the quest with him dead. Some players elect to kill Brandis to get two unique pieces of loot off his corpse.
The first is his laser pistol, Survivor’s Special. It’s a unique laser pistol with the Bloodied legendary weapon effect. Bloodied is mediocre at best, however, so it’s not worth killing him over.
The second piece of unique gear on Paladin Brandis is his all-black BOS officer uniform. It’s the only one in the game you can obtain, and admittedly, it’s a fine piece of clothing. If you have at least rank 3 of the Pickpocket perk, you can steal it off Brandis without making him hostile.
Make your choice, collect the loot inside the bunker, especially the fusion core, Stealth Boy, and Brandis’ holotape, then head back to your quest giver.
Turning in The Lost Patrol to Danse
Head back to Danse and tell him your findings. If you killed Brandis, Danse is sad to hear the news and take the holotags of the squad members. If you convince Brandis to rejoin the Brotherhood, he will be pleased. He will inform you that he will make a full report for the Elder based on your investigation before rewarding you with 200 caps.
Talk about an underwhelming reward, am I right? That’s why you don’t turn in the quest with Danse.
Turning in The Lost Patrol to Kells

To get the best quest reward, hand in The Lost Patrol to Lancer Captain Kells. His reactions are virtually the same as Danse’s. Kells will reward you with the Steadfast BOS combat armor piece. And that’s even if you failed to convince Brandis to come back to the Brotherhood and left him alone.
I recommended that you be at least level 35 before handing in this quest because this is a leveled armor piece. If you’re at a high enough level, it will spawn as a heavy combat chest piece, the unique heavy variant in the game. Sure, Steadfast isn’t the best legendary armor effect, but it’s something. It beats a standard heavy combat armor chest piece anyway.
And with that, The Lost Patrol is complete.
FAQs
Question: Is the Steadfast BOS combat armor chest piece worth wearing?
Answer: Heavy combat armor is second only to synth armor and marine armor. But finding heavy combat armor is a lot easier than the other two. It’ll be a good modular chest piece for a while.
Question: Do I need to find the distress signals in a specific order?
Answer: No. You can come across Brandis’ deceased squadmates any way you want. On my first playthrough, I did it in reverse order. What matters is getting the bunker’s access code, which you can only do after finding all three.
Question: Is Brandis involved in any more quests after The Lost Patrol?
Answer: Brandis will appear and fight alongside the Brotherhood of Steel several times, but he has no significant role in any other quest in the game. I kind of wish there would have been a chaperone mission of some sort. You know, where we’d have to escort Brandis on a mission to confirm if he’s ready for duty again. Another missed opportunity, I suppose.
Conclusion
While I can’t say that I’m too keen on the Brotherhood of Steel’s motivations or characterizations in Fallout 4, I can’t lie; they have some pretty awesome quests. The Lost Patrol will take you through numerous wasteland hotspots full of dangerous enemies and good loot. So even if the combat chest piece you get isn’t your thing, you’ll still be satisfied with the loot you got along the way.
Your journey with the Brotherhood of Steel in the Commonwealth is only just getting started. There’s plenty more where this came from, soldier. Head back to the Prydwen double time, and get ready for your next mission. I’ll see you next time here at Wasteland Gamers!